How to Make an Origami Turkey
Published

Build an origami turkey with a folded bird body and a separate accordion tail. This two-piece paper craft uses a little glue to attach the fan; it is not a single-sheet, glue-free model. Thin squares cut from printer paper work well. Keep the body folds sharp, let the glue set, and lean the finished bird against a place card for a Thanksgiving table decoration.
One fold at a time
Take your time. A neat crease makes the next fold easier.
Step 1: Crease the body square
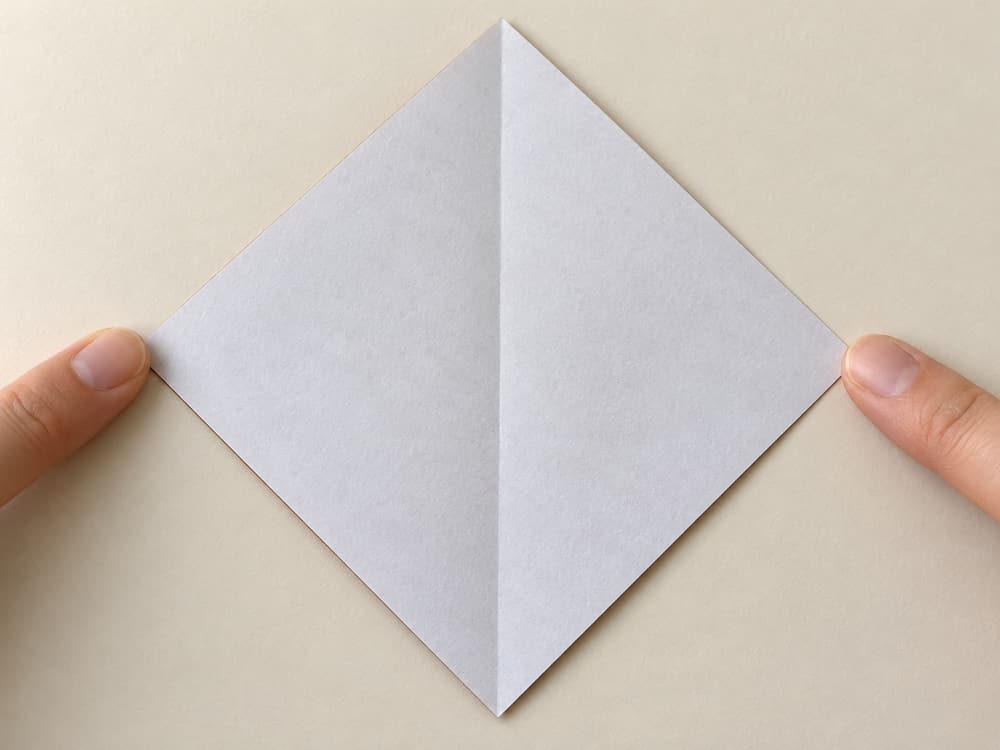
Place the brown square white side up as a diamond; fold left point to right point, then reopen.
Step 2: Make a kite
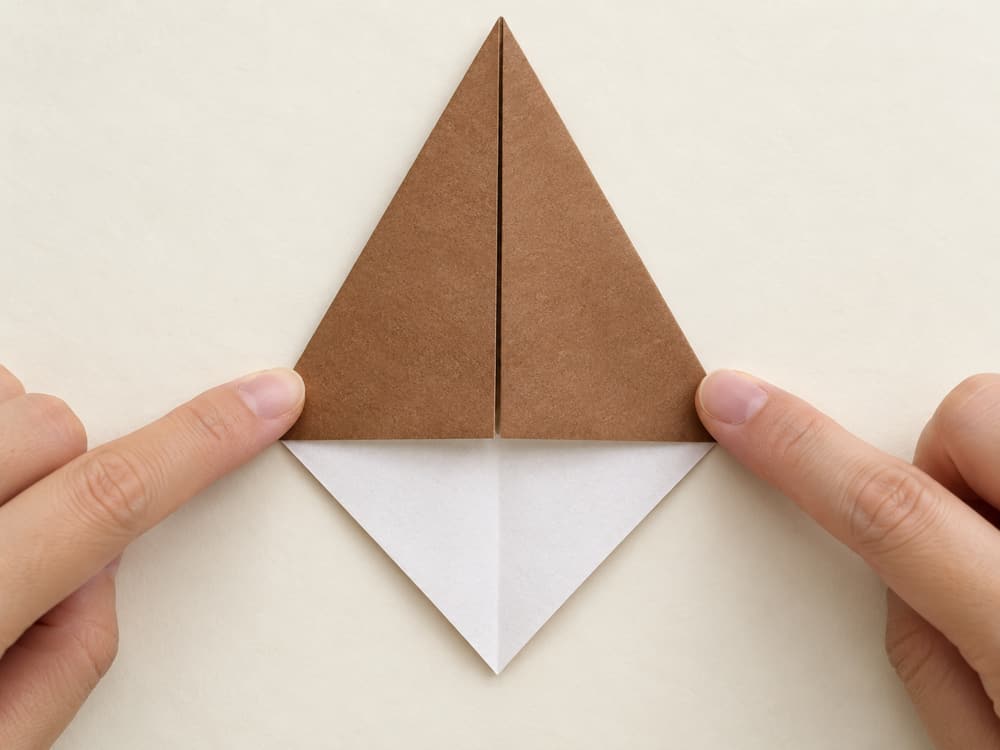
Fold both upper sloping edges to the upright center crease.
Step 3: Narrow the neck
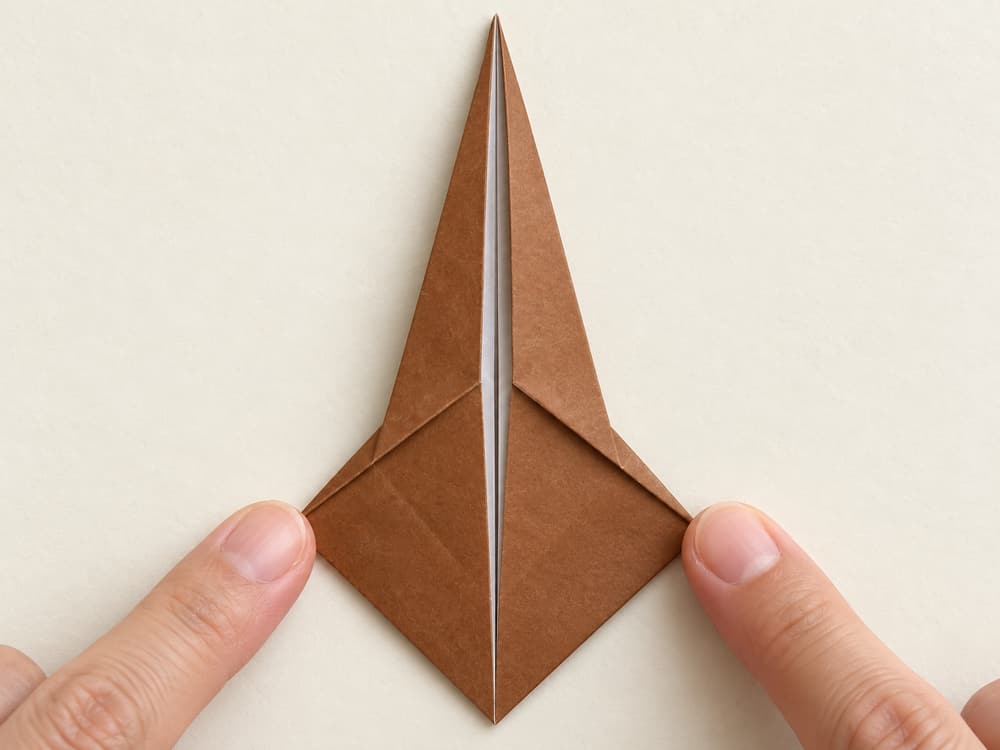
Fold the two upper sloping edges to the center once more.
Step 4: Lower the long point
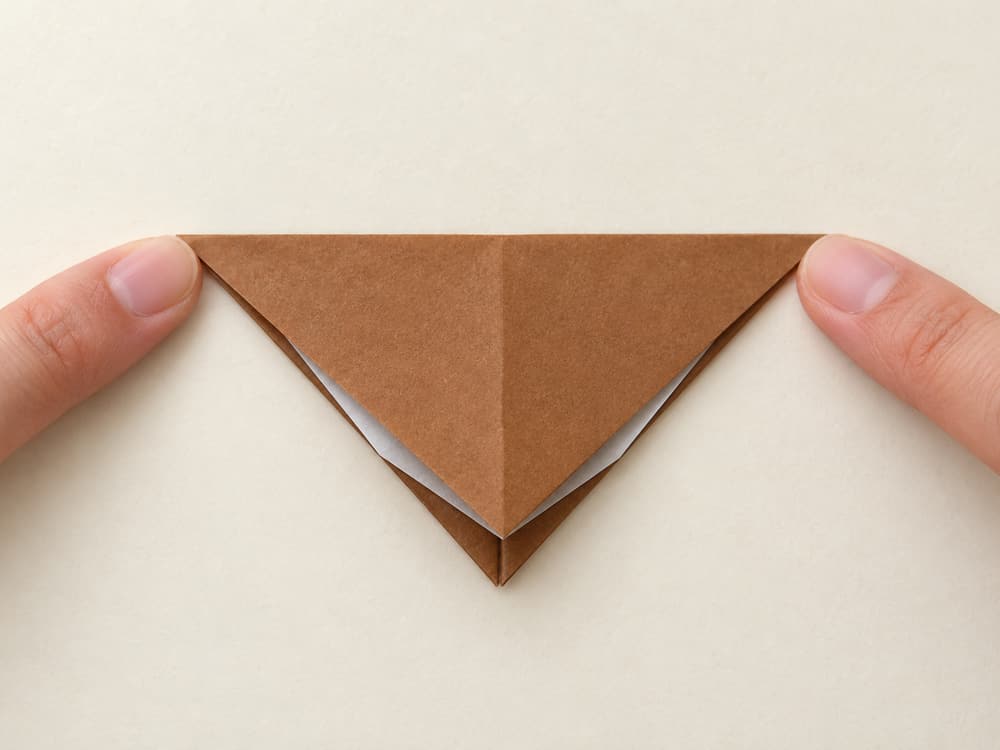
Turn the kite over and bring its long top point down to the bottom point.
Step 5: Return the neck point
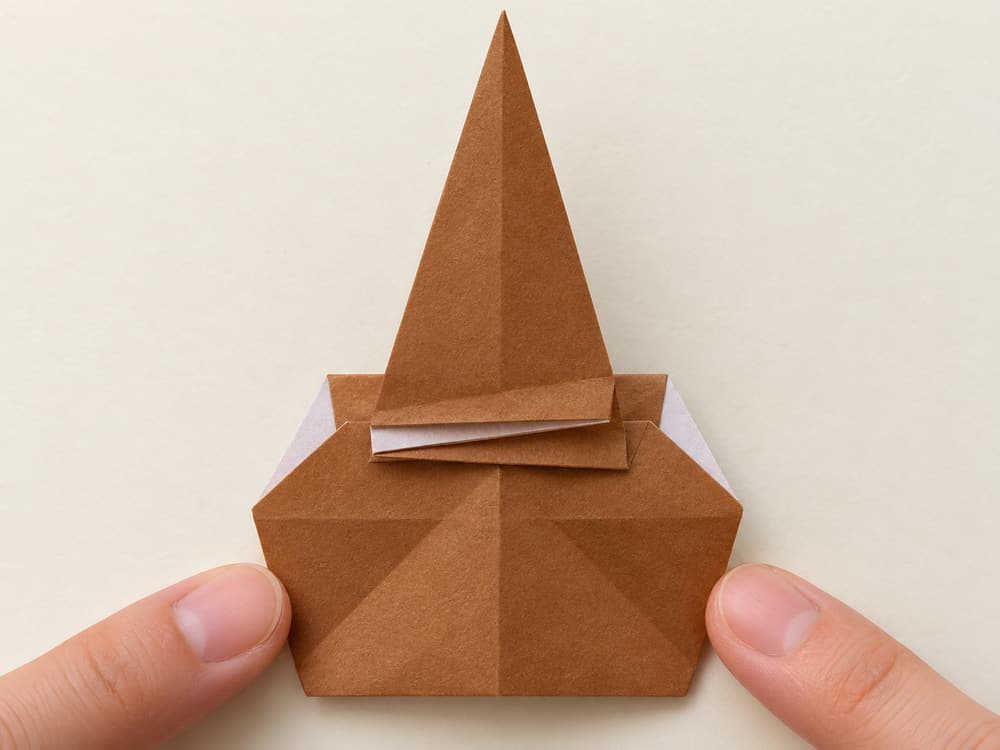
Fold that point upward, leaving a narrow pleat at the bottom.
Step 6: Close the body
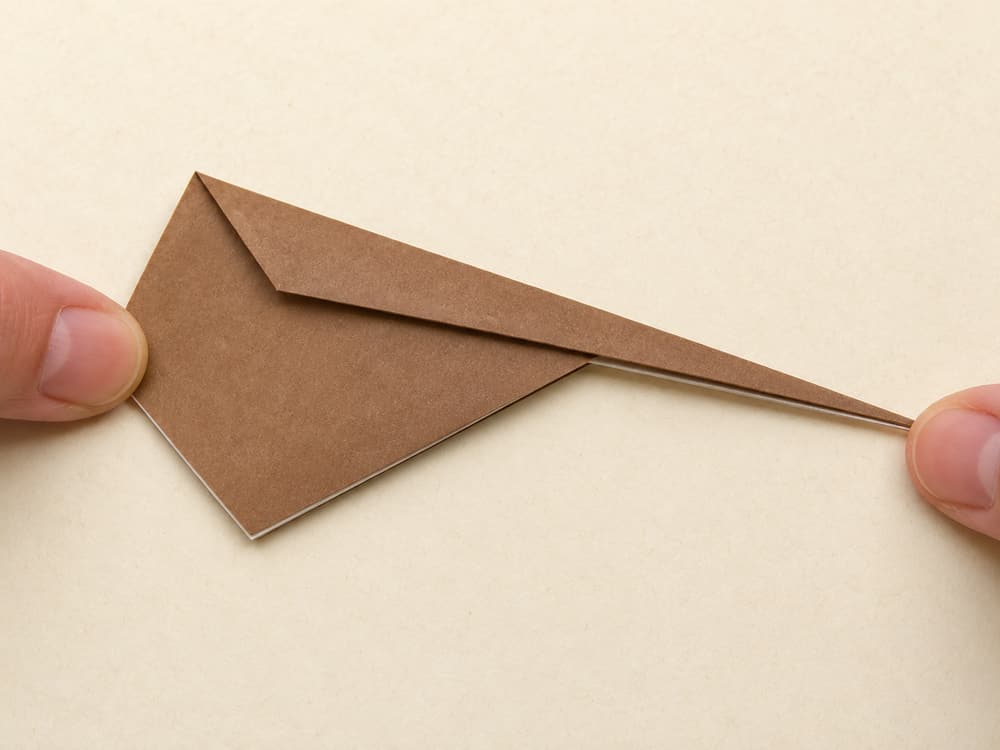
Fold the model in half behind the upright center crease.
Step 7: Raise the neck
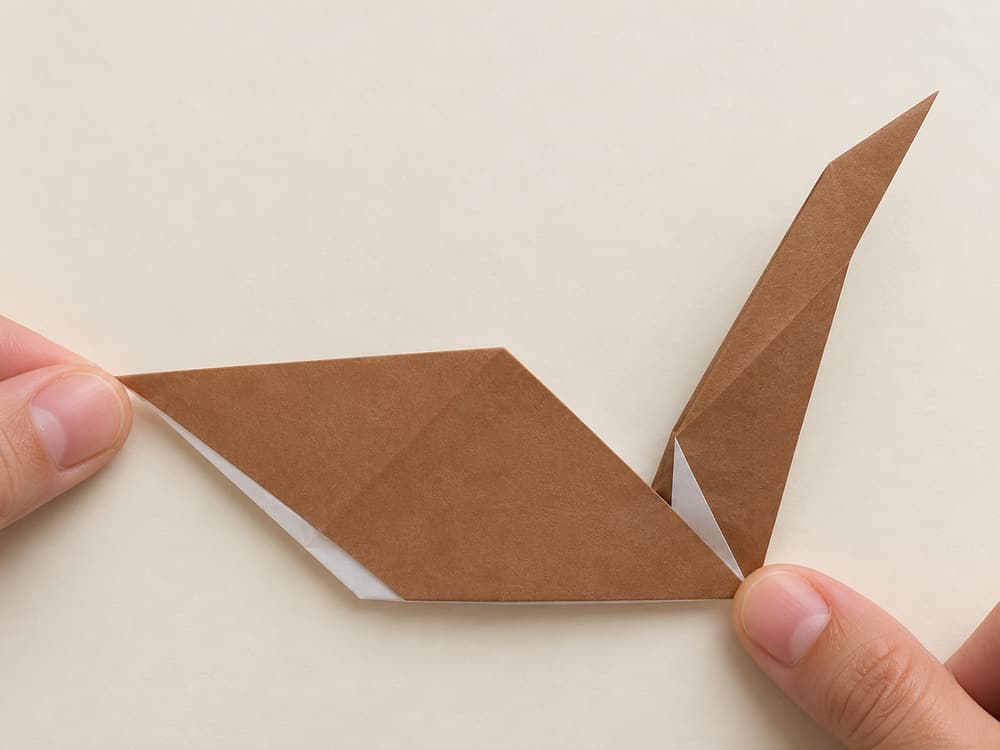
Pull the narrow neck upward from the body and pinch its base to hold the angle.
Step 8: Bend a small head
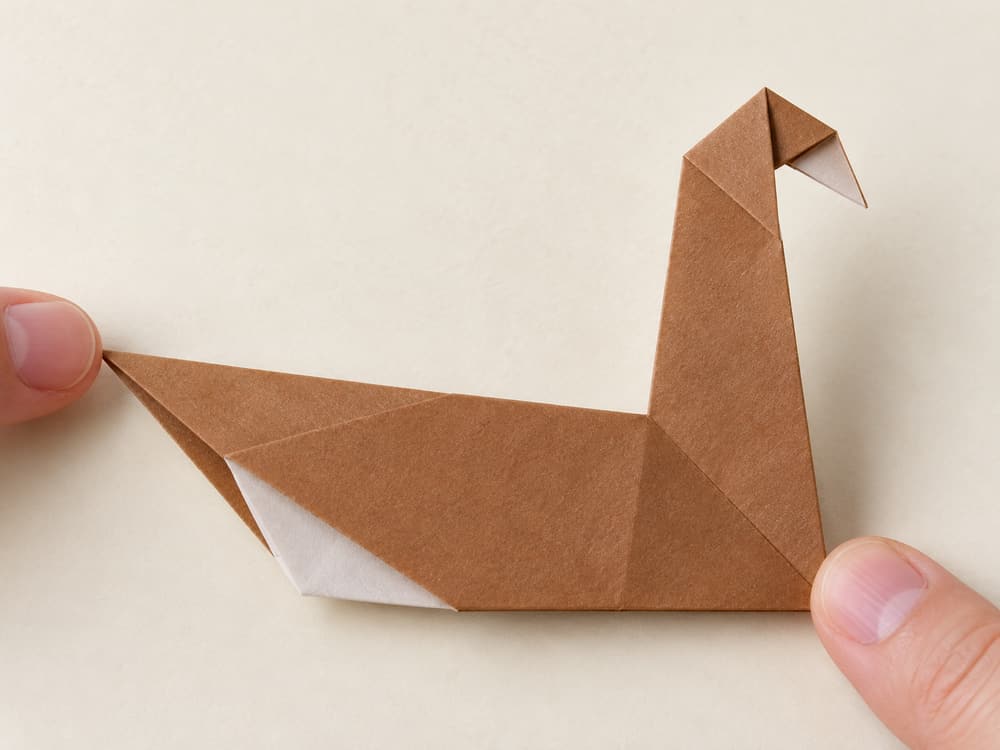
Fold the neck tip downward to make a short head and beak.
Step 9: Pleat the tail square
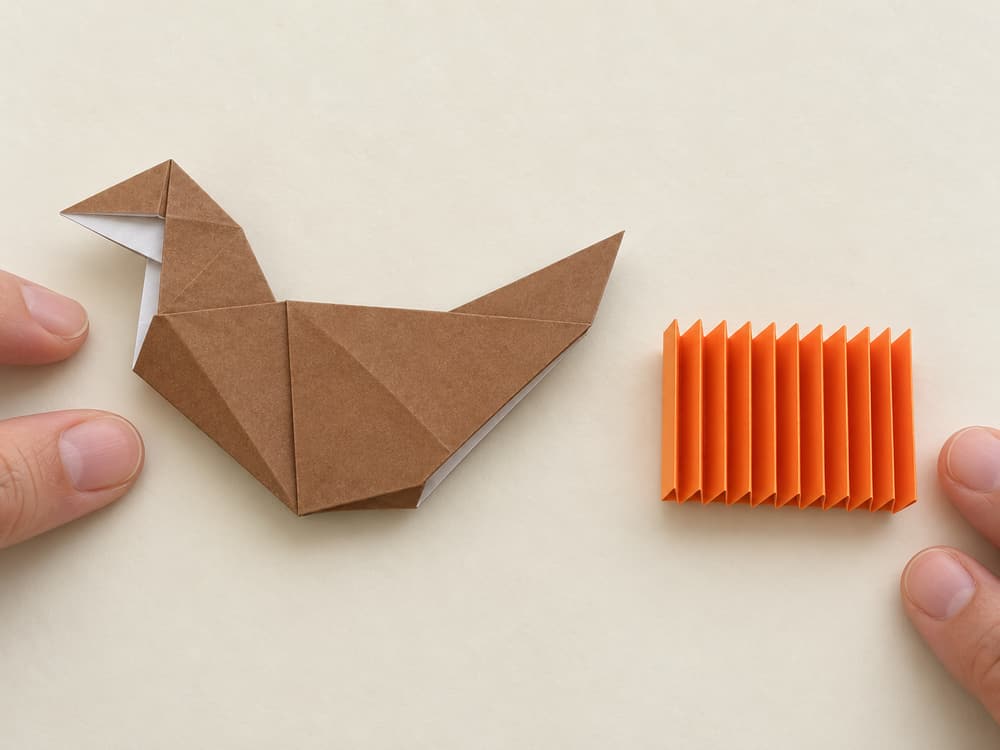
Accordion-fold the orange square into equal half-inch strips, alternating forward and backward folds across the whole sheet.
Step 10: Join the fan center
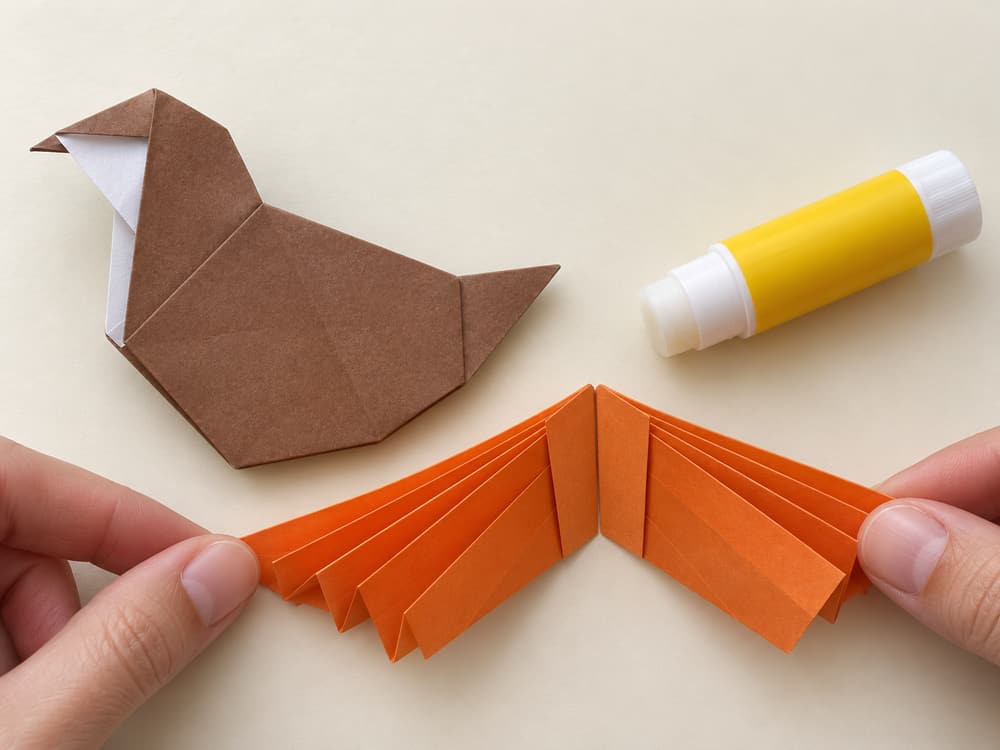
Fold the pleated stack in half; glue the two inside end panels together.
Step 11: Open the fan
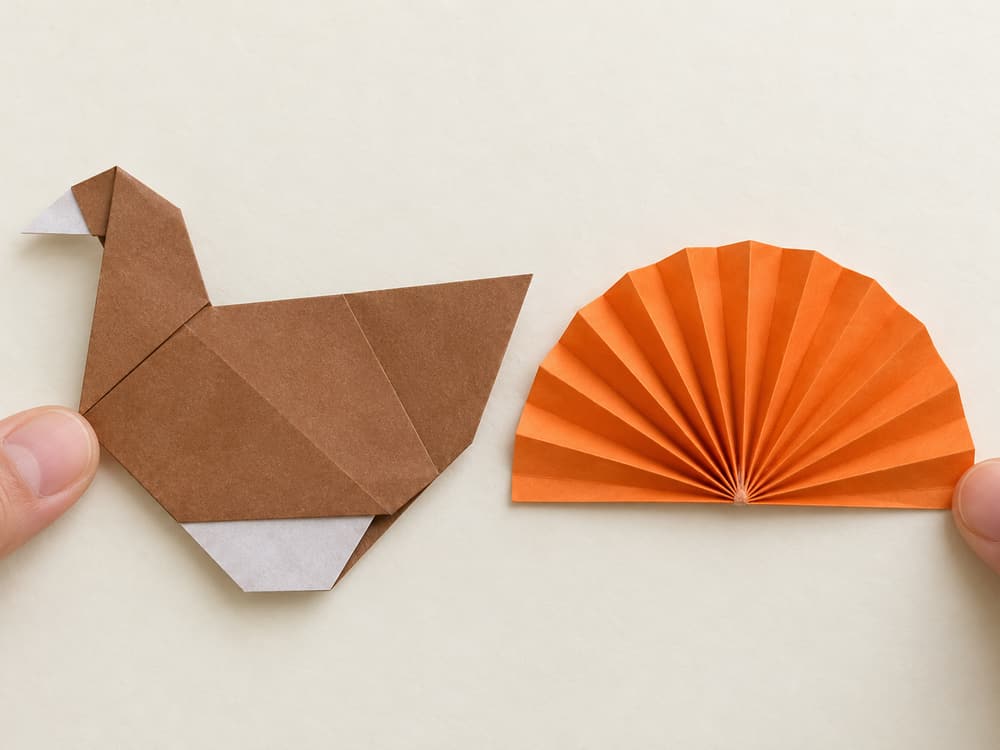
Spread the pleats into a semicircle and press the glued seam closed.
Step 12: Attach the tail
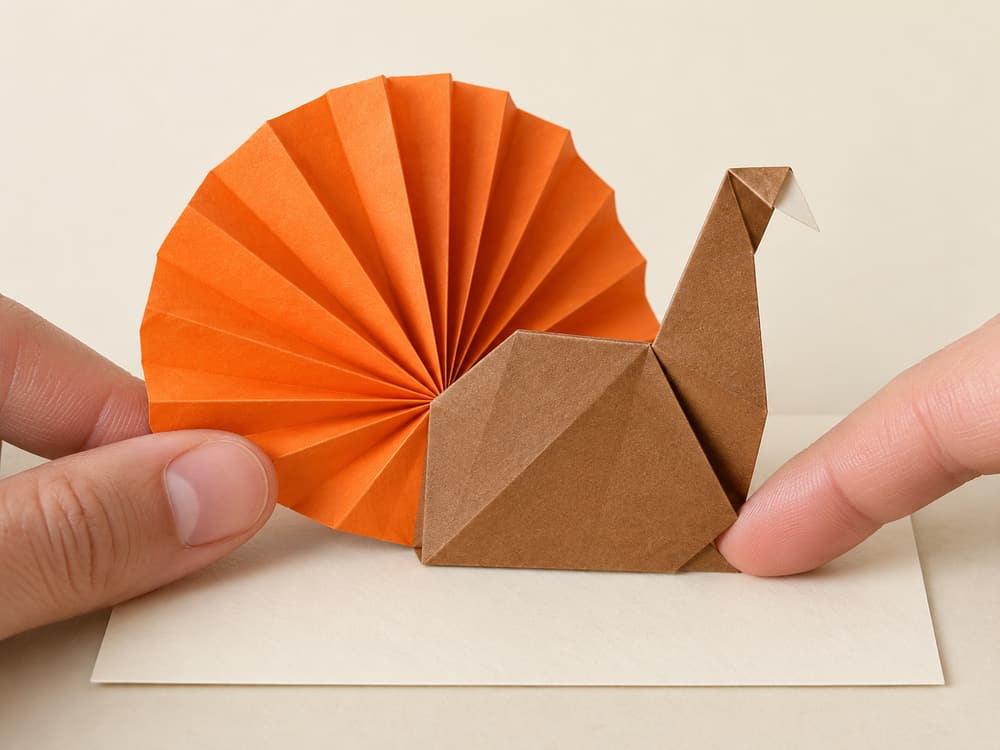
Glue the fan behind the body; hold until set, then lean the turkey against a place card.


Try something else
More easy folds for your next sheet.


