How to Make an Origami Shark
Published

Turn a square of everyday paper into an origami shark with a pointed tail and a raised dorsal fin. This easy cut-and-fold version uses two short snips, so keep scissors nearby and help young folders with the cutting. Start with a six-inch square cut from printer or notebook paper. Plain paper works well; color is optional, and a small drawn eye finishes the face.
One fold at a time
Take your time. A neat crease makes the next fold easier.
Step 1: Make the first guide

Fold the top corner onto the bottom corner; press the crease, then open the paper.
Step 2: Cross the center

Bring the left corner to the right corner; crease firmly, then open the square.
Step 3: Shape the right side

Fold the upper-right sloping edge inward until it meets the vertical center crease.
Step 4: Complete the kite

Fold the upper-left sloping edge to the same center crease, making a long kite.
Step 5: Mark the long fold
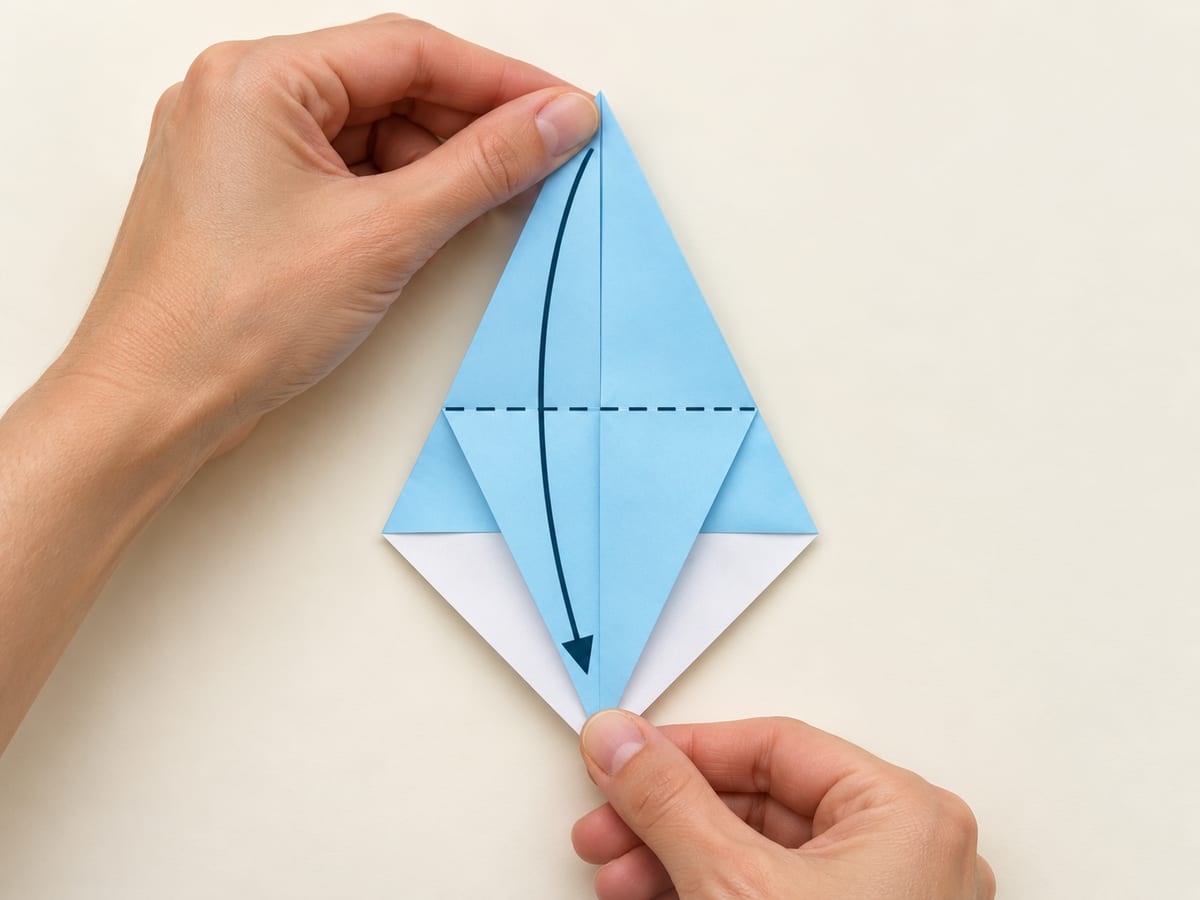
Bring the narrow top tip to the bottom tip; crease, then open it back up.
Step 6: Add the middle guide

Bring the narrow top tip to the bottom edge of the folded flaps; crease and reopen.
Step 7: Mark the tail guide
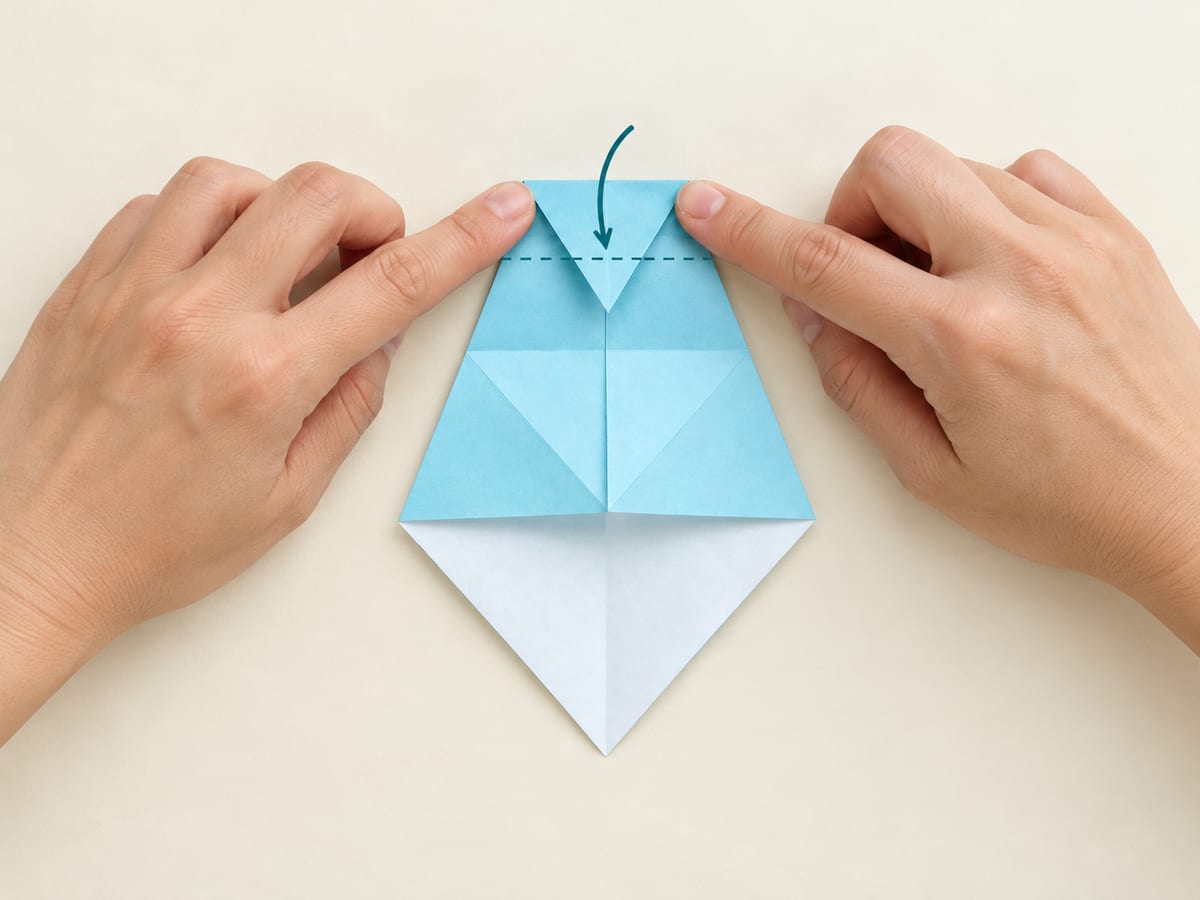
Fold the narrow top tip down to the crease from Step 5; press, then reopen.
Step 8: Release the dorsal fin

Cut the lower-right folded flap along its diagonal crease toward the center; open the freed triangle to the right.
Step 9: Separate the tail tips
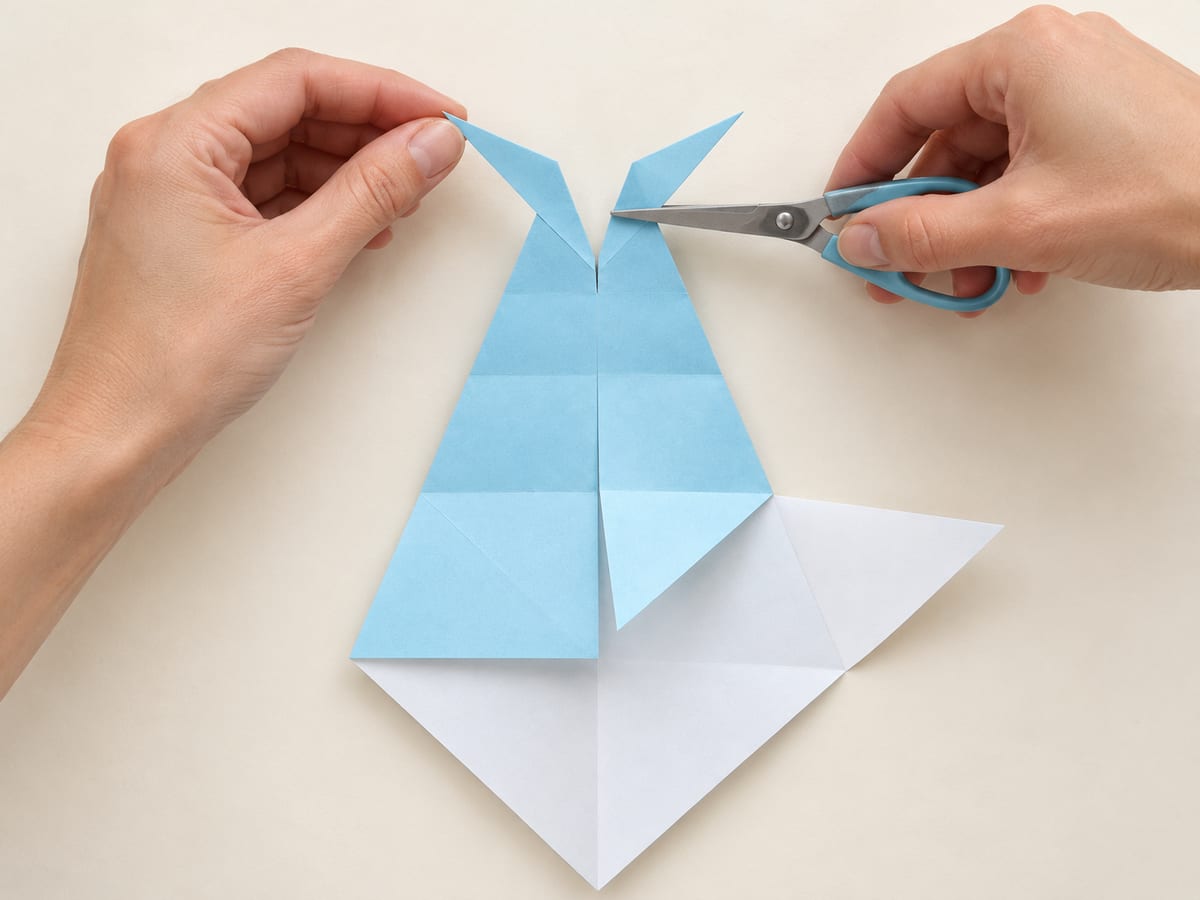
Snip the top tip along the center crease to the nearest horizontal guide; fold the two tips outward.
Step 10: Turn the body

Rotate the paper clockwise a quarter turn, placing the split tail on the right.
Step 11: Close the shark

Fold the lower half behind the upper half along the long center crease, keeping the dorsal triangle above the body.
Step 12: Fan out the tail

Fold the nearer tail tip downward at its base so the two tail points spread apart.
Step 13: Finish the face

Draw a small eye and a curved gill near the broad left end; press the body flat.


Try something else
More easy folds for your next sheet.


Coming soon
Not published yet— steps · — min · —