How to Make an Origami Ninja Star
Published

Build an origami ninja star from two matching squares that lock together without glue. Different colors make the two pieces easier to follow, and two square sticky notes can make a miniature version. Start with larger printer-paper squares while learning the final tucks. The pieces must bend in opposite directions; check them side by side before joining their four points.
One fold at a time
Take your time. A neat crease makes the next fold easier.
Step 1: Mark both squares
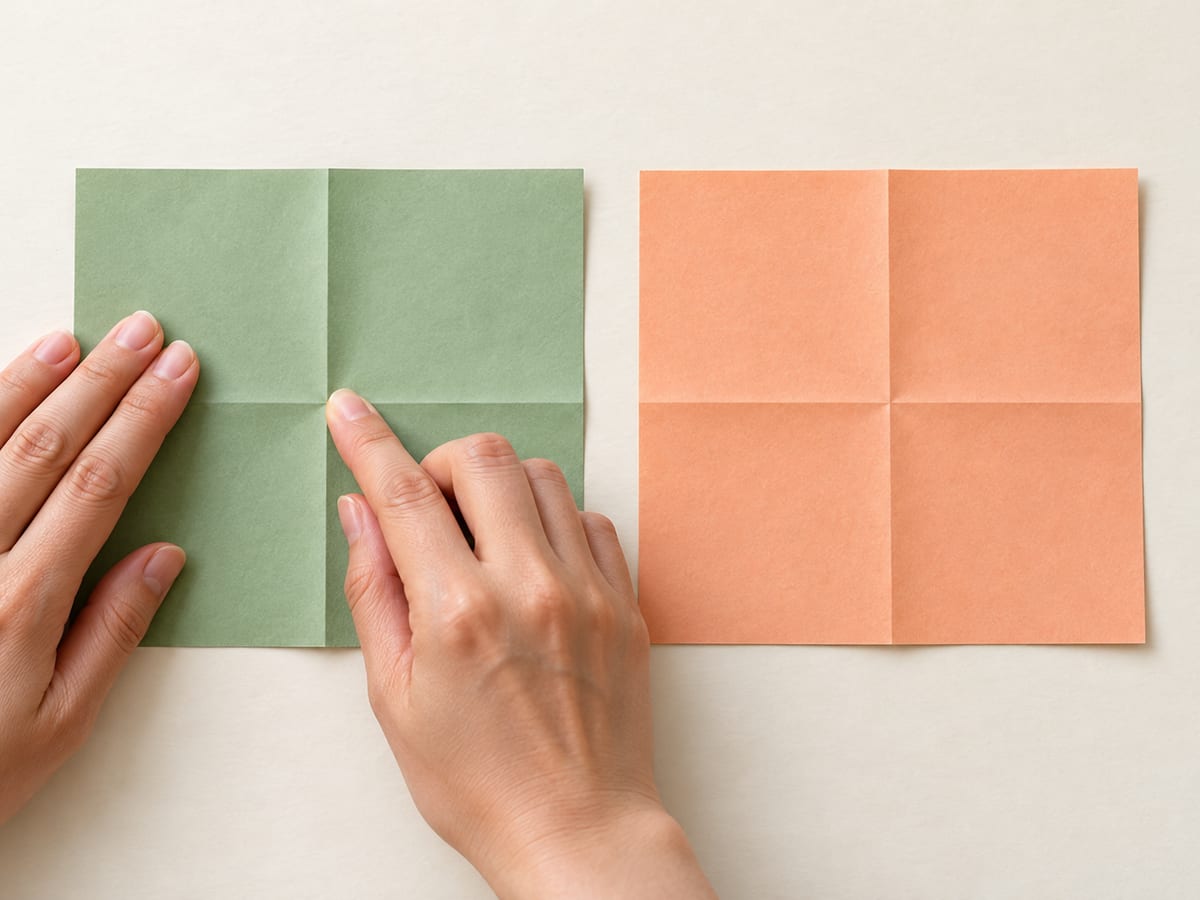
Fold each square in half vertically and horizontally, then reopen both sheets.
Step 2: Fold the long edges
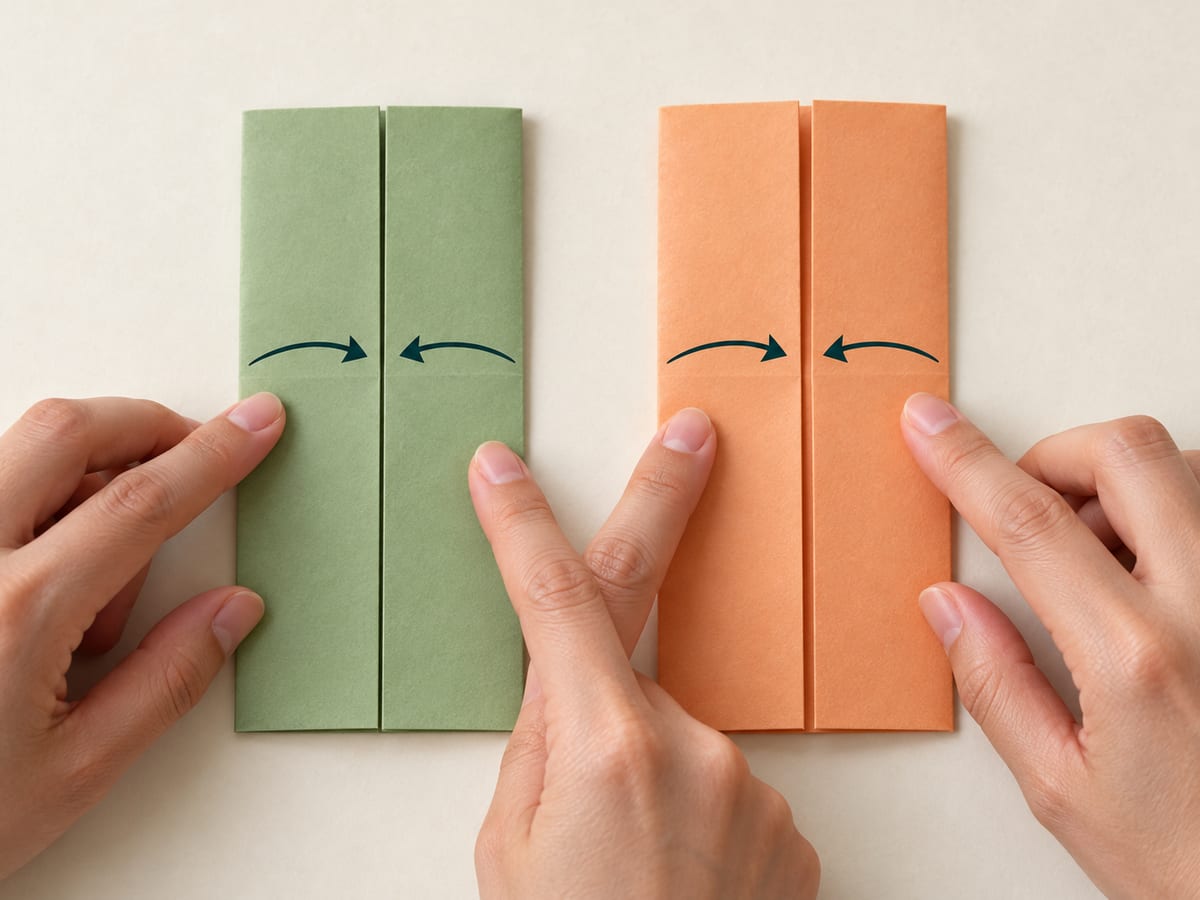
Bring the left and right edges of each square to its vertical center line.
Step 3: Make two strips
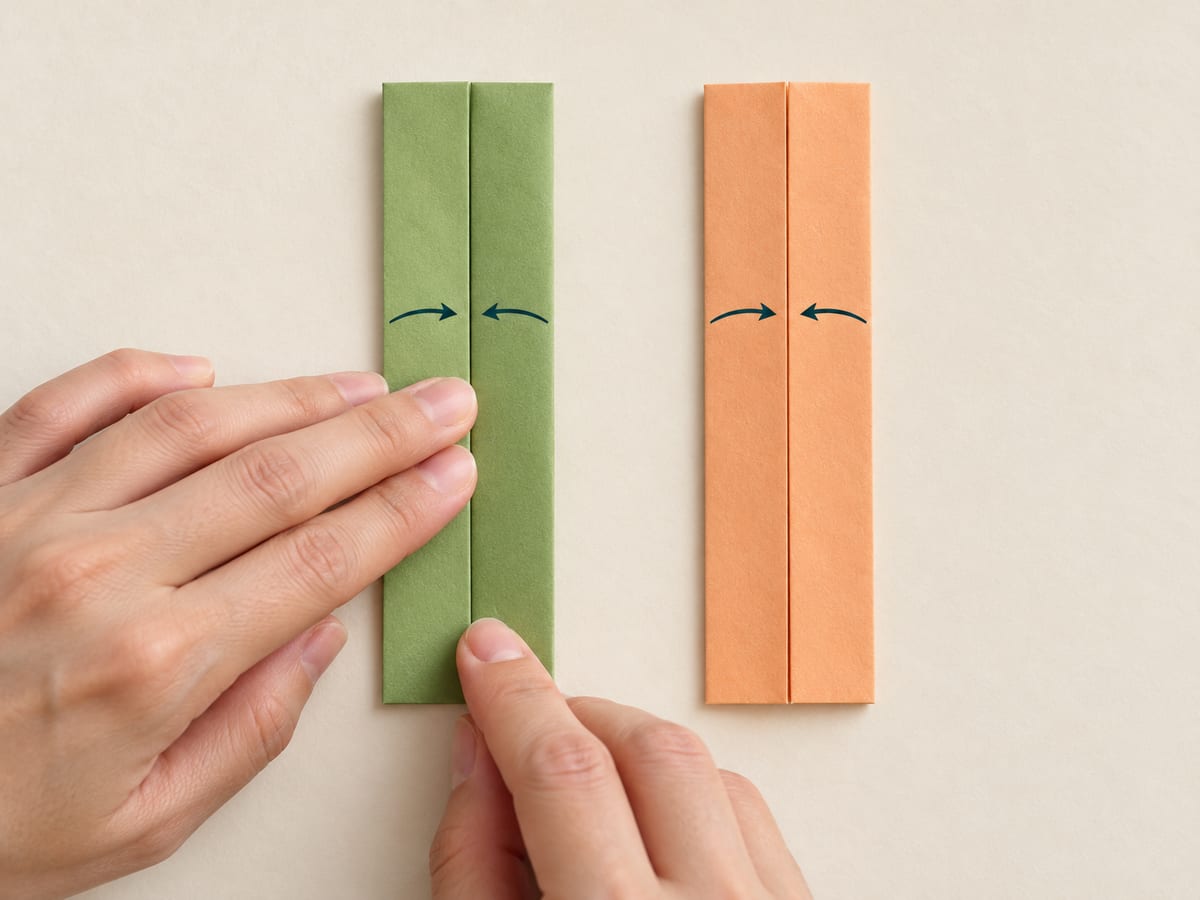
Fold each piece in half lengthwise to make two narrow strips.
Step 4: Shape the first tips
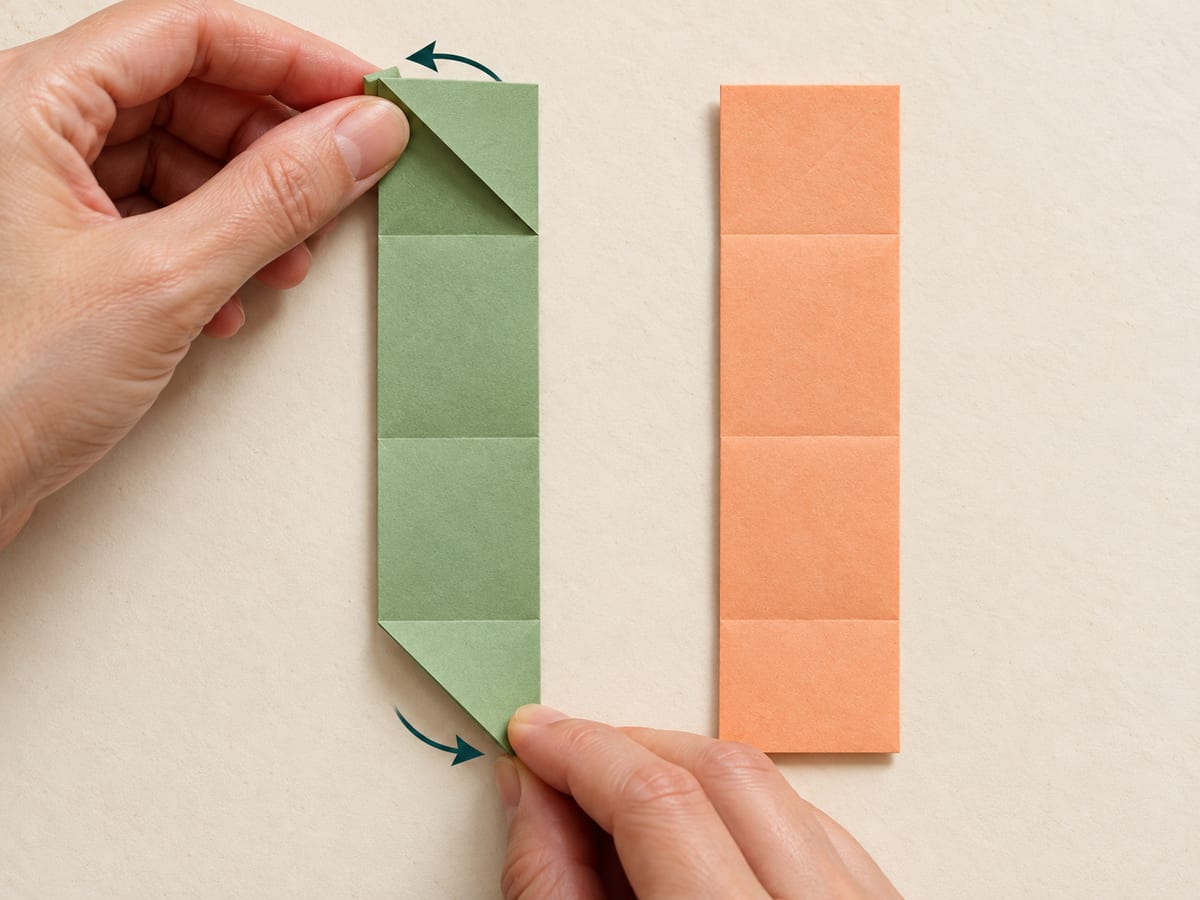
On the first strip, fold the top corner leftward and the bottom corner rightward to make triangular ends.
Step 5: Mirror the second tips
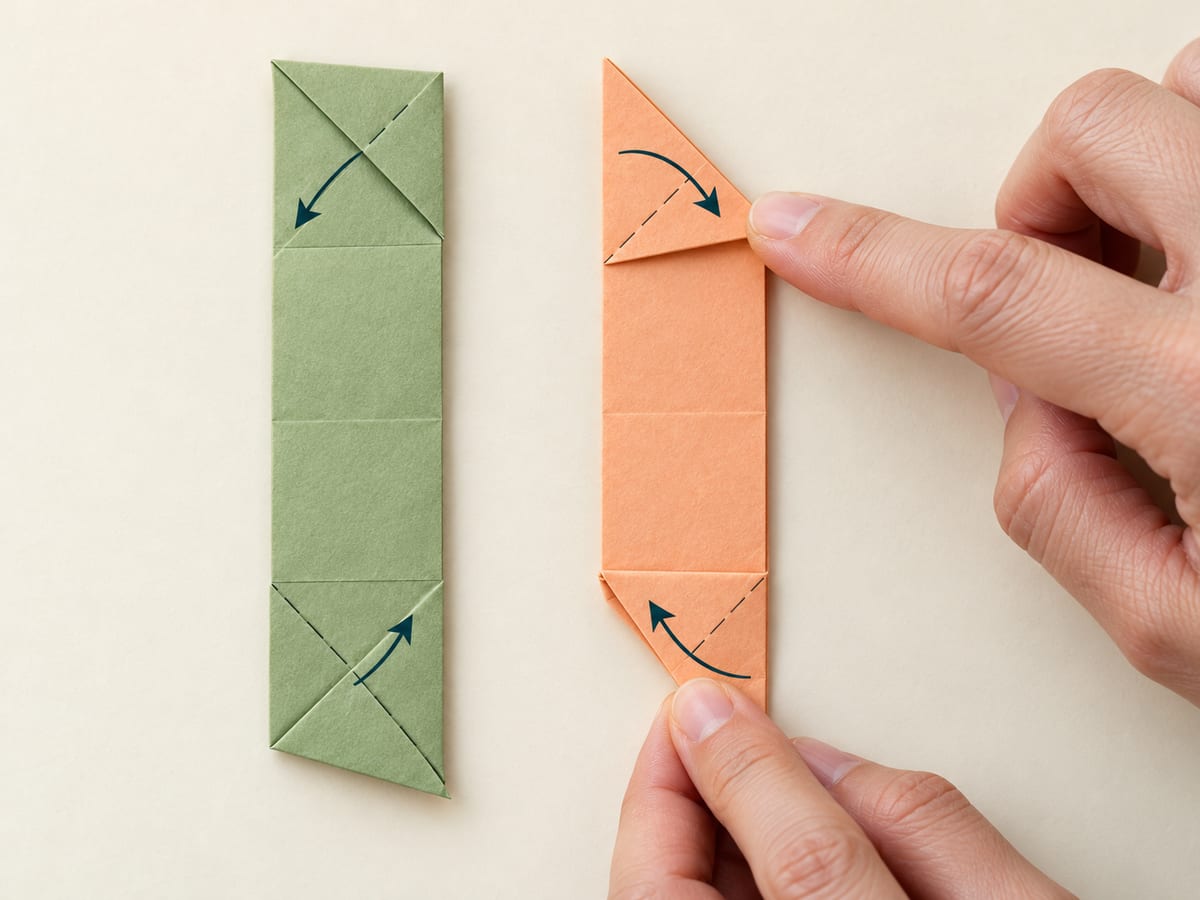
On the second strip, fold the top corner rightward and the bottom corner leftward.
Step 6: Bend the first upper arm
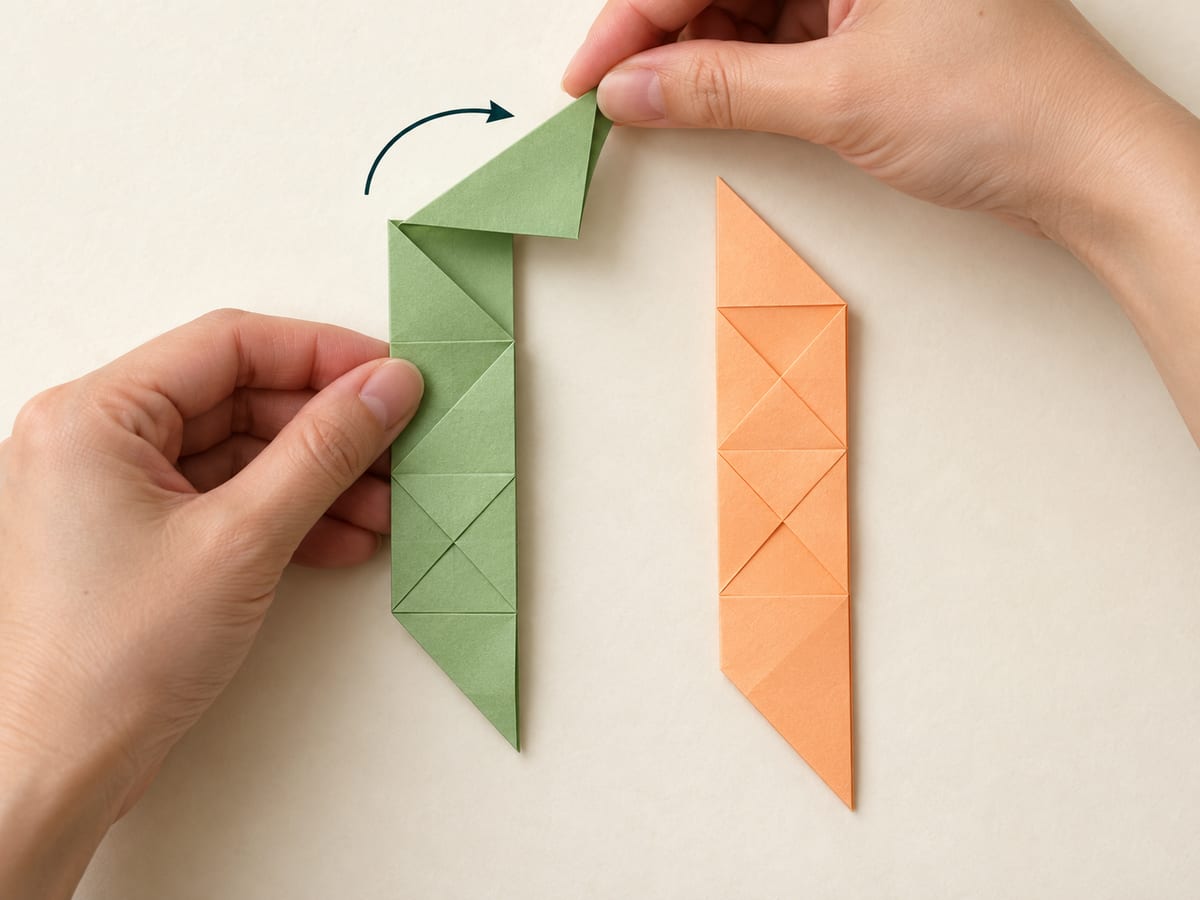
Fold the upper half of the first strip diagonally rightward at its midpoint.
Step 7: Bend the first lower arm
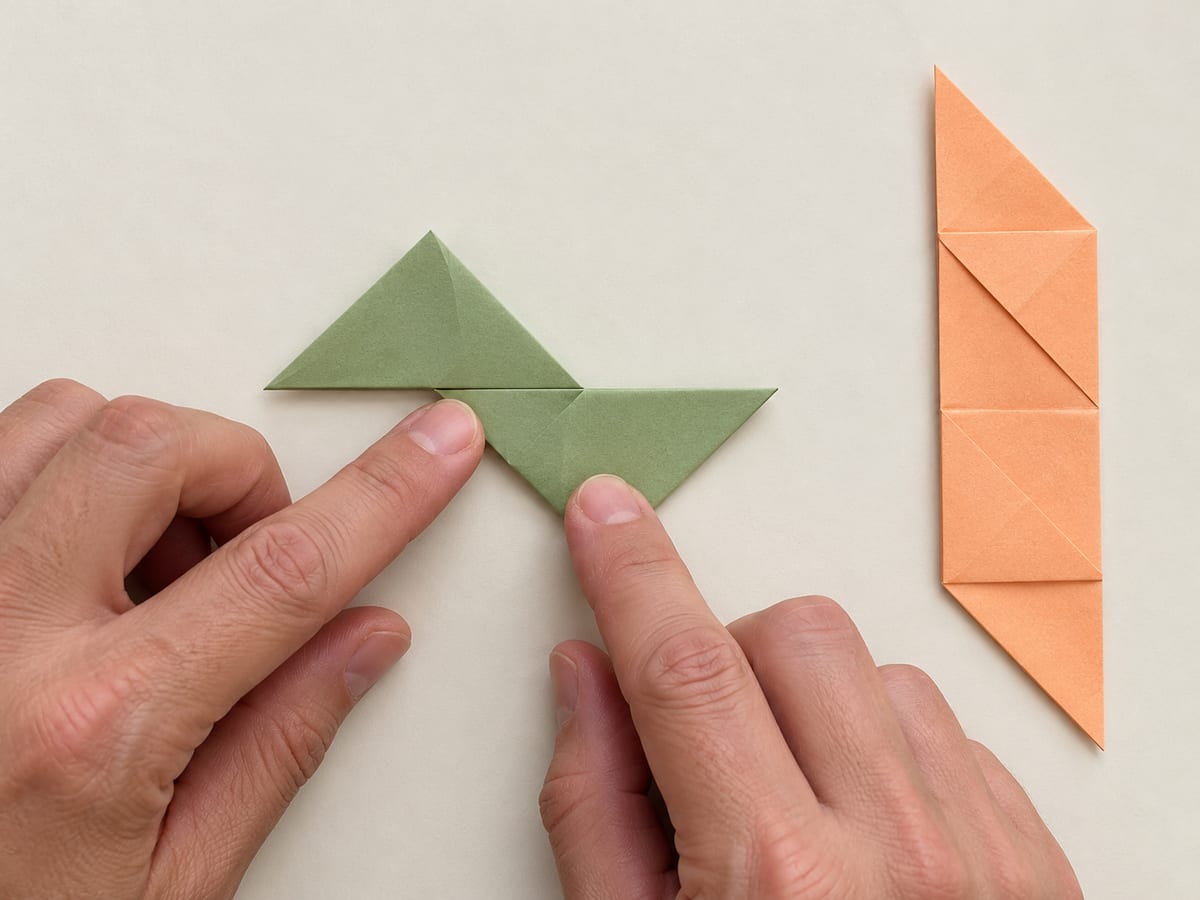
Fold its lower half diagonally leftward, making a compact zigzag with two pointed arms.
Step 8: Mirror the second zigzag

Bend the second strip into the opposite zigzag, with its upper arm leftward and lower arm rightward.
Step 9: Cross the pieces
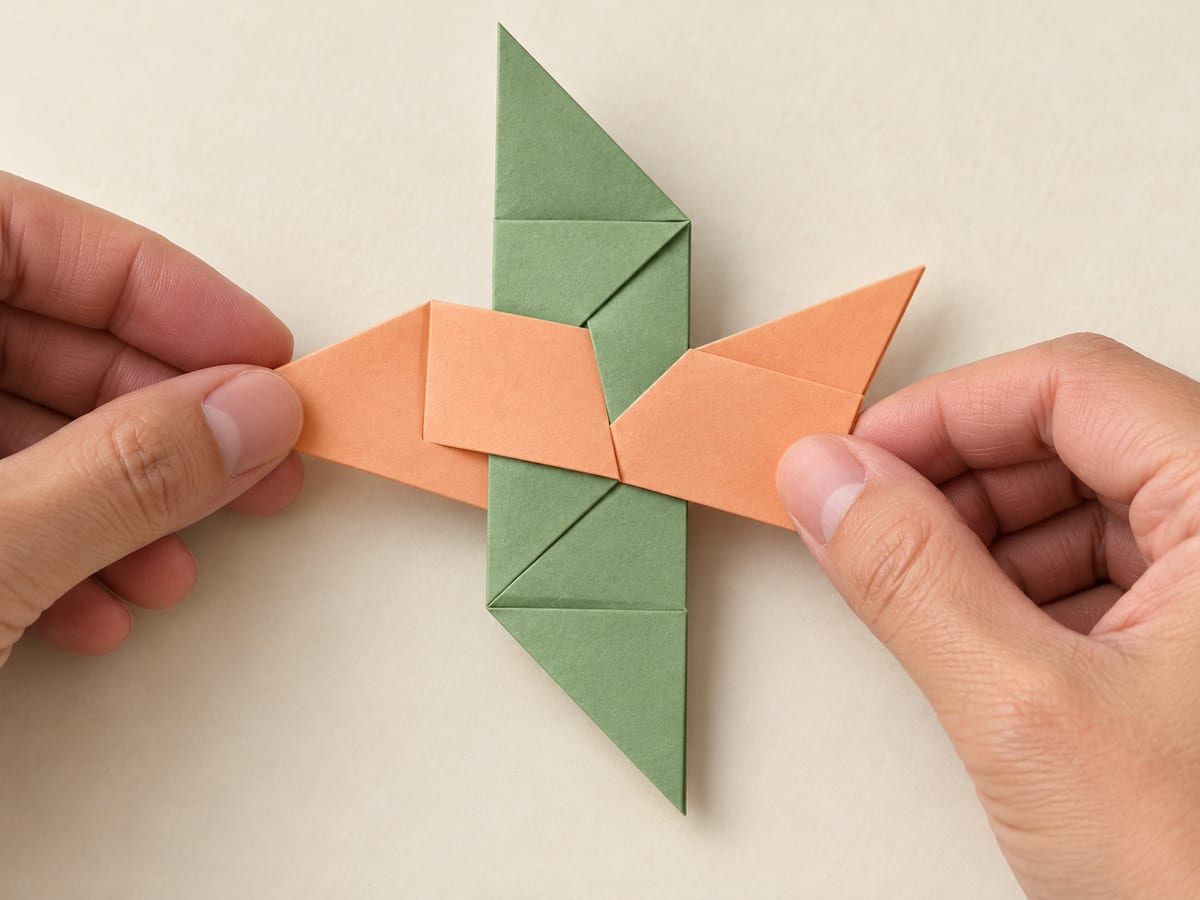
Turn the first piece over and place the second across it, with their center sections overlapping at right angles.
Step 10: Tuck the first points
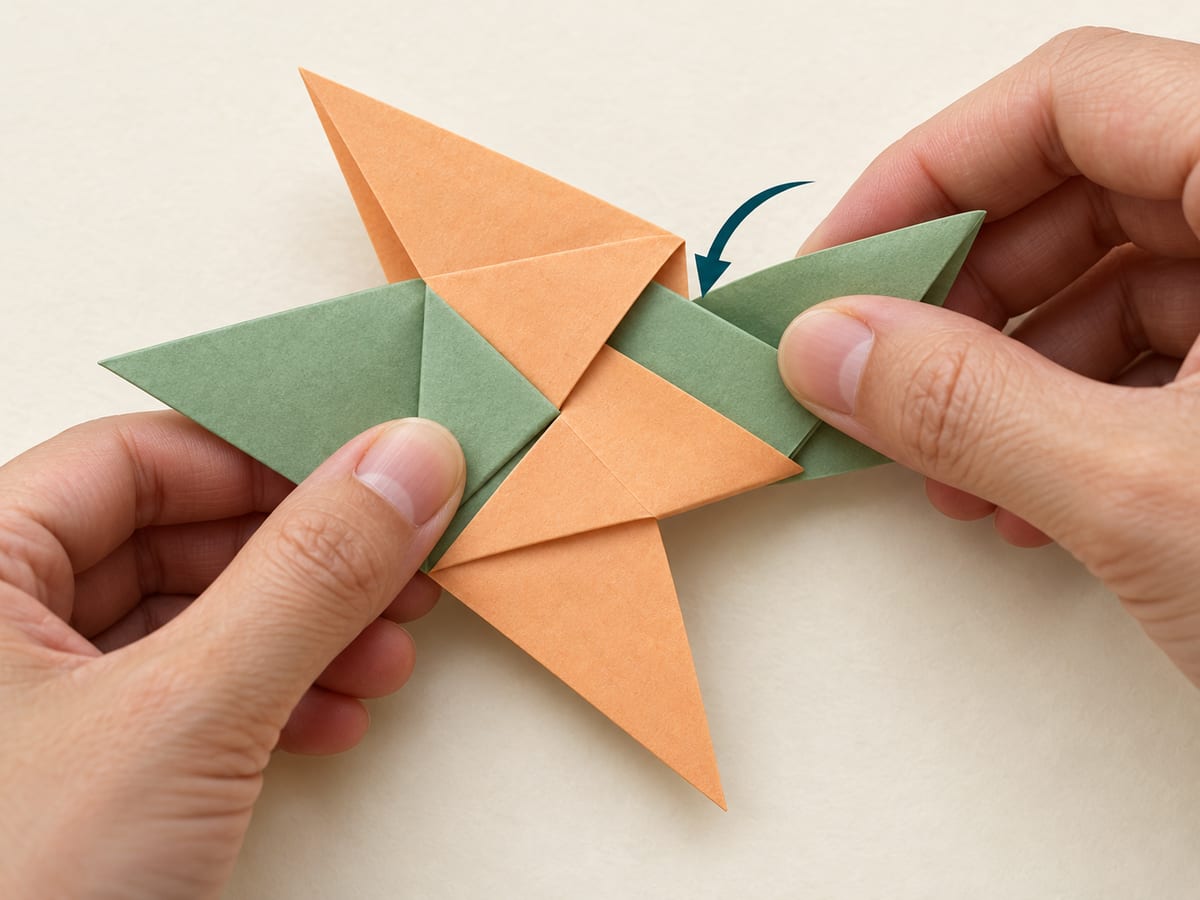
Fold the two exposed points of the lower piece across the center and slide them into the upper piece pockets.
Step 11: Turn the joined star
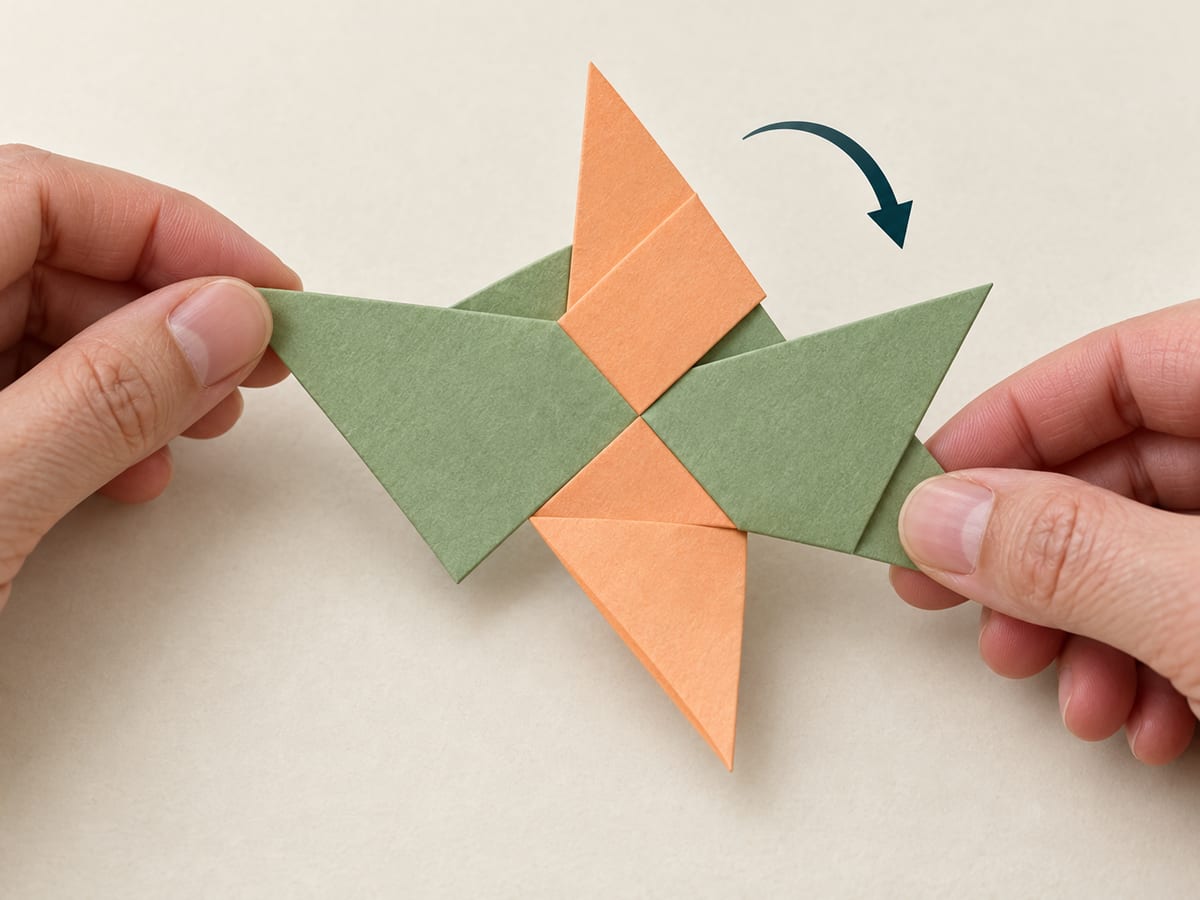
Turn the joined pieces over carefully, keeping the first two tucks in place.
Step 12: Close the final pockets
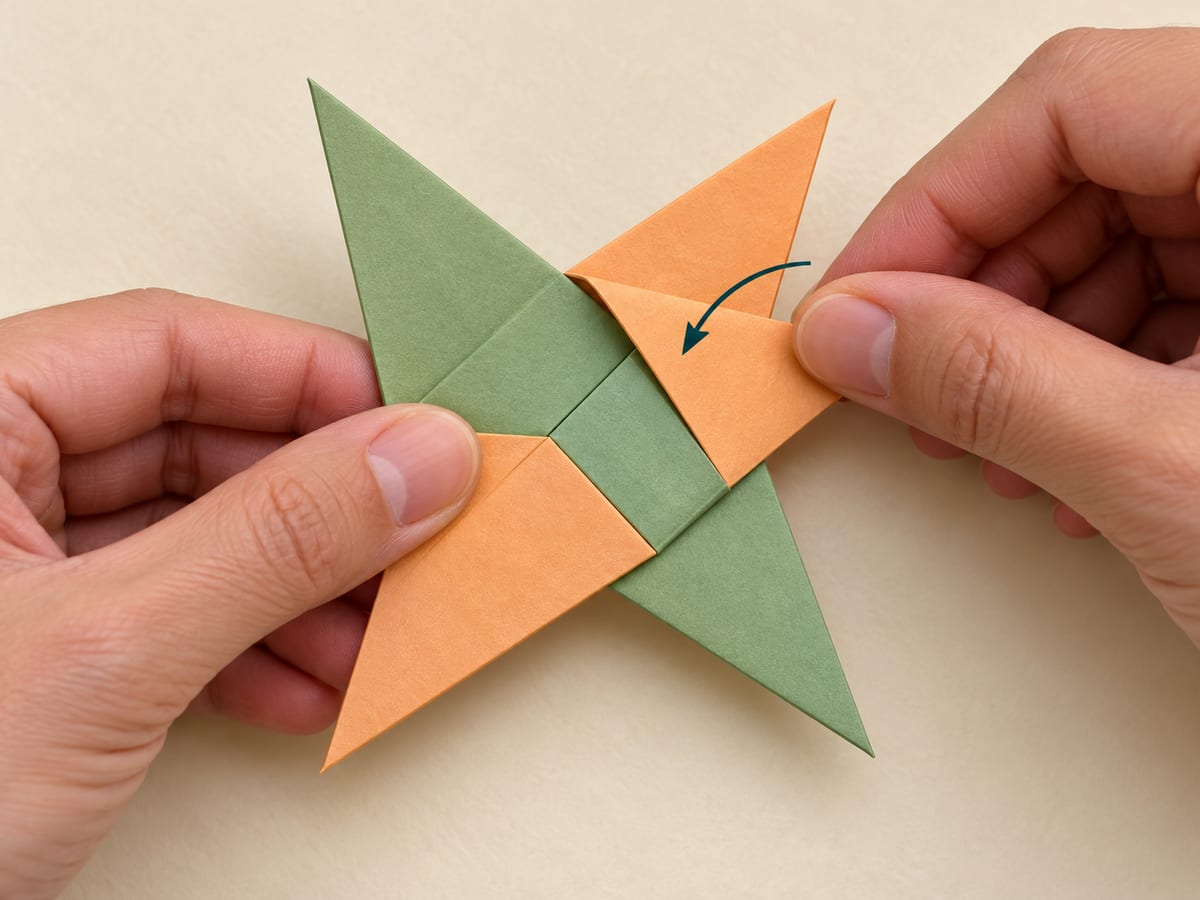
Fold the remaining two points across the center, tuck them into the open pockets, and flatten the star.


Try something else
More easy folds for your next sheet.


Coming soon
Not published yet— steps · — min · —