How to Make an Origami Penguin
Published

This origami penguin uses a single square and a small reverse fold for its head. Two-color paper makes the belly easier to see, but plain printer paper, notebook paper, or a square sticky note works too. Begin with a larger square if reverse folds are new to you. Leave a little space between the first flaps so the body stays broad.
One fold at a time
Take your time. A neat crease makes the next fold easier.
Step 1: Mark the body center
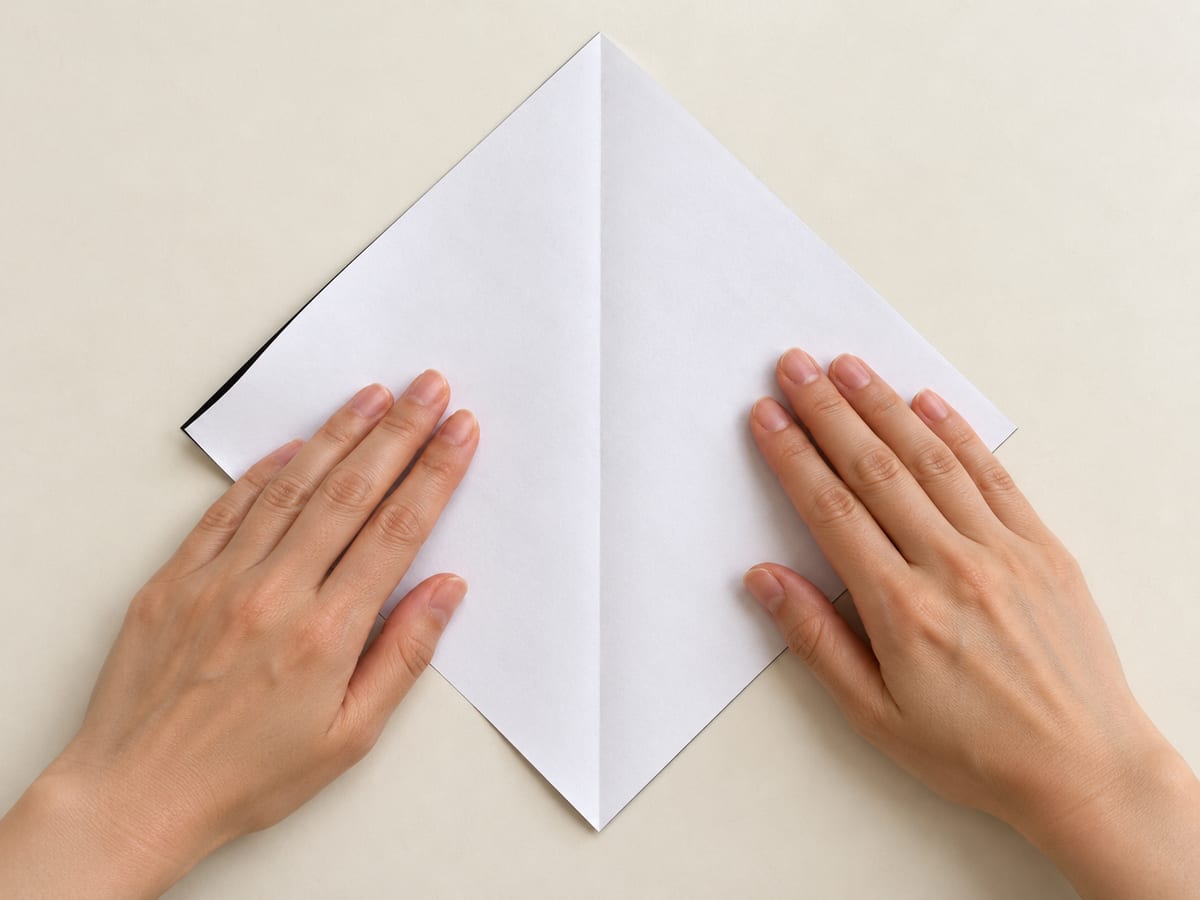
Place the square as a diamond; fold the left corner to the right, crease, reopen, and turn over.
Step 2: Shape the upper sides
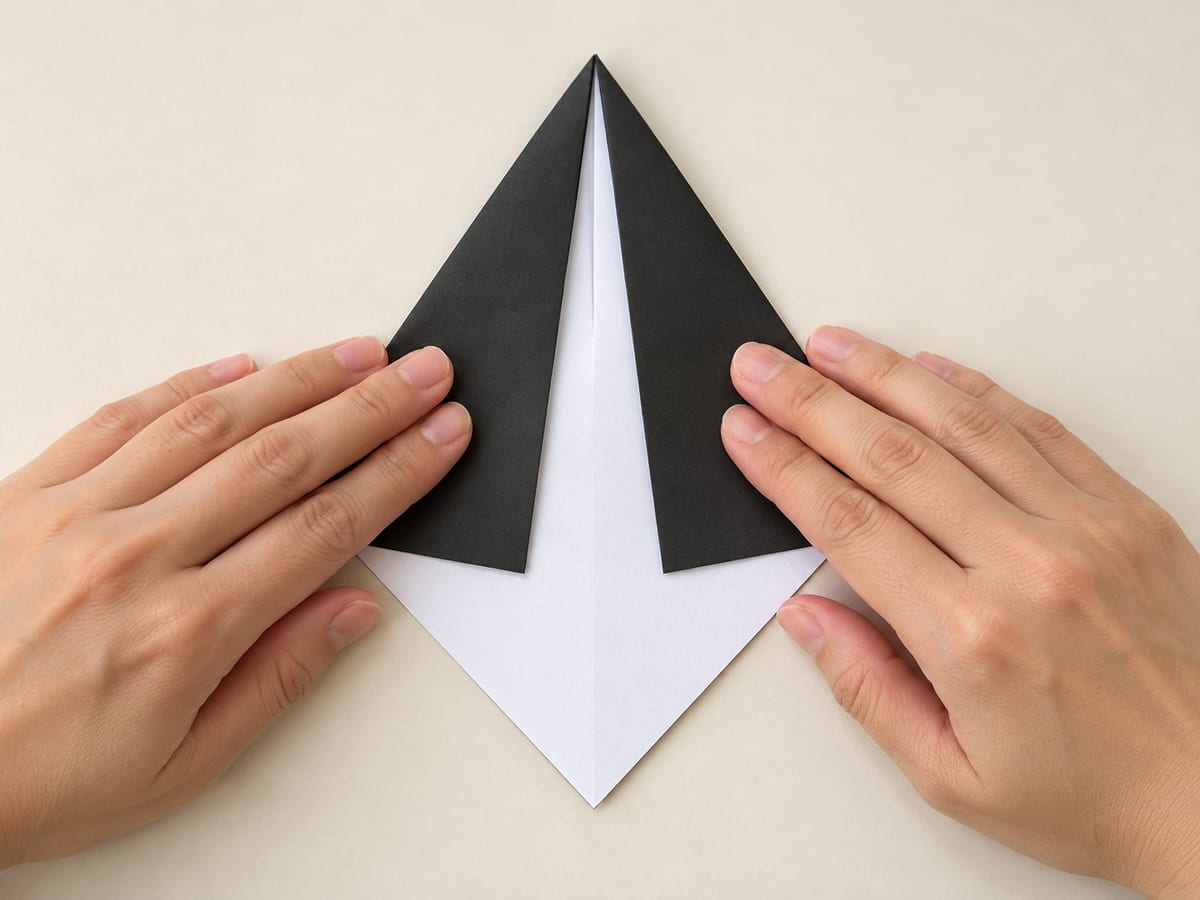
Fold both upper sloping edges inward, leaving a narrow gap between them instead of meeting at the center.
Step 3: Turn the body over
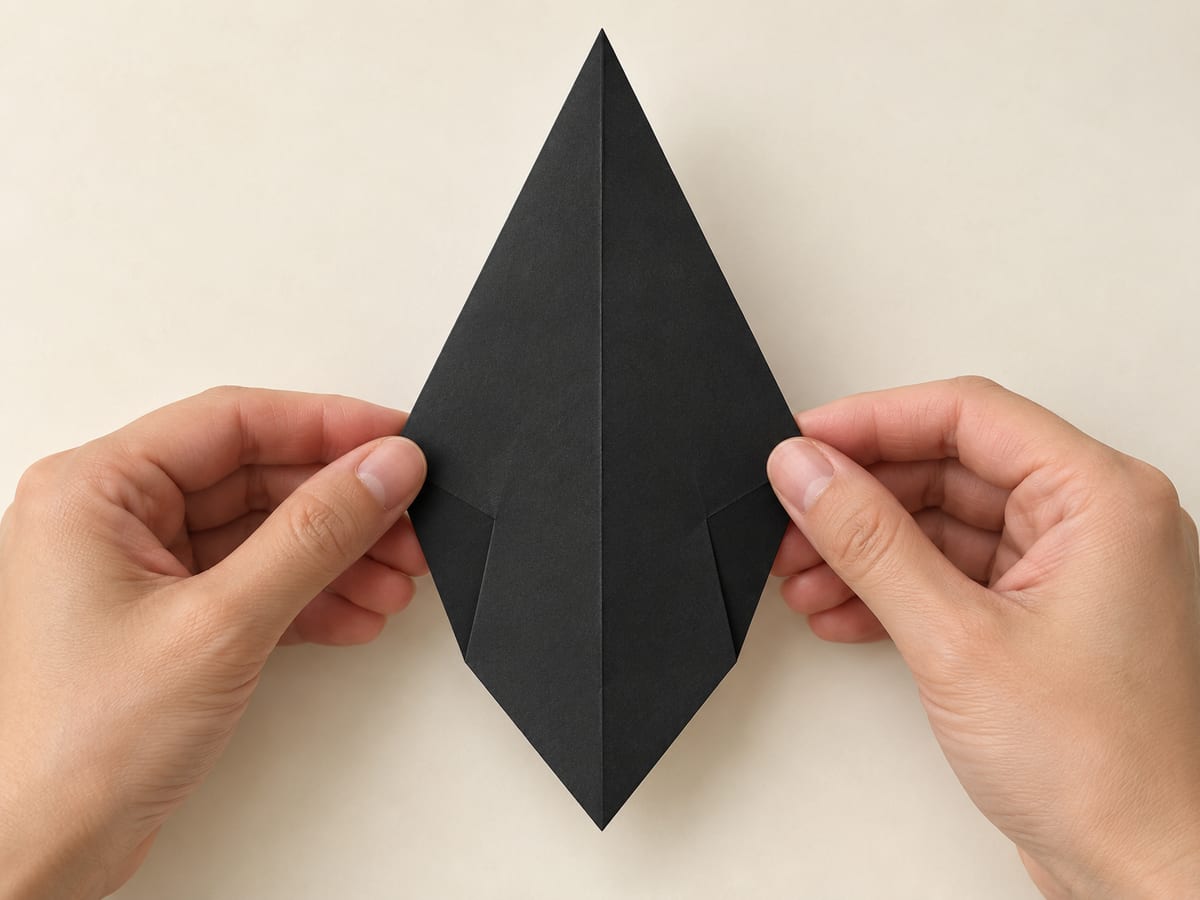
Turn the paper over, keeping the long point at the top.
Step 4: Taper the lower sides
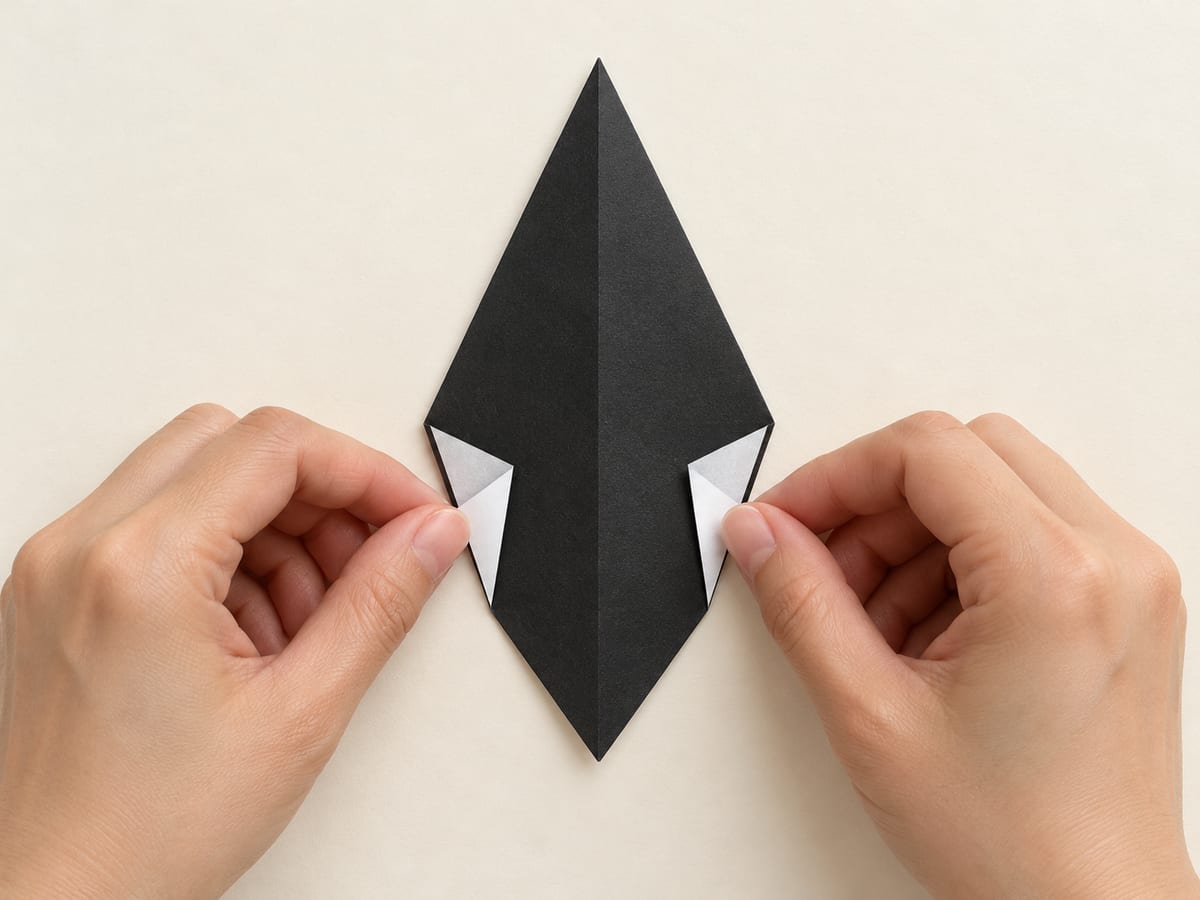
Fold the left and right side corners inward to make the body narrower below its shoulders.
Step 5: Flatten the bottom
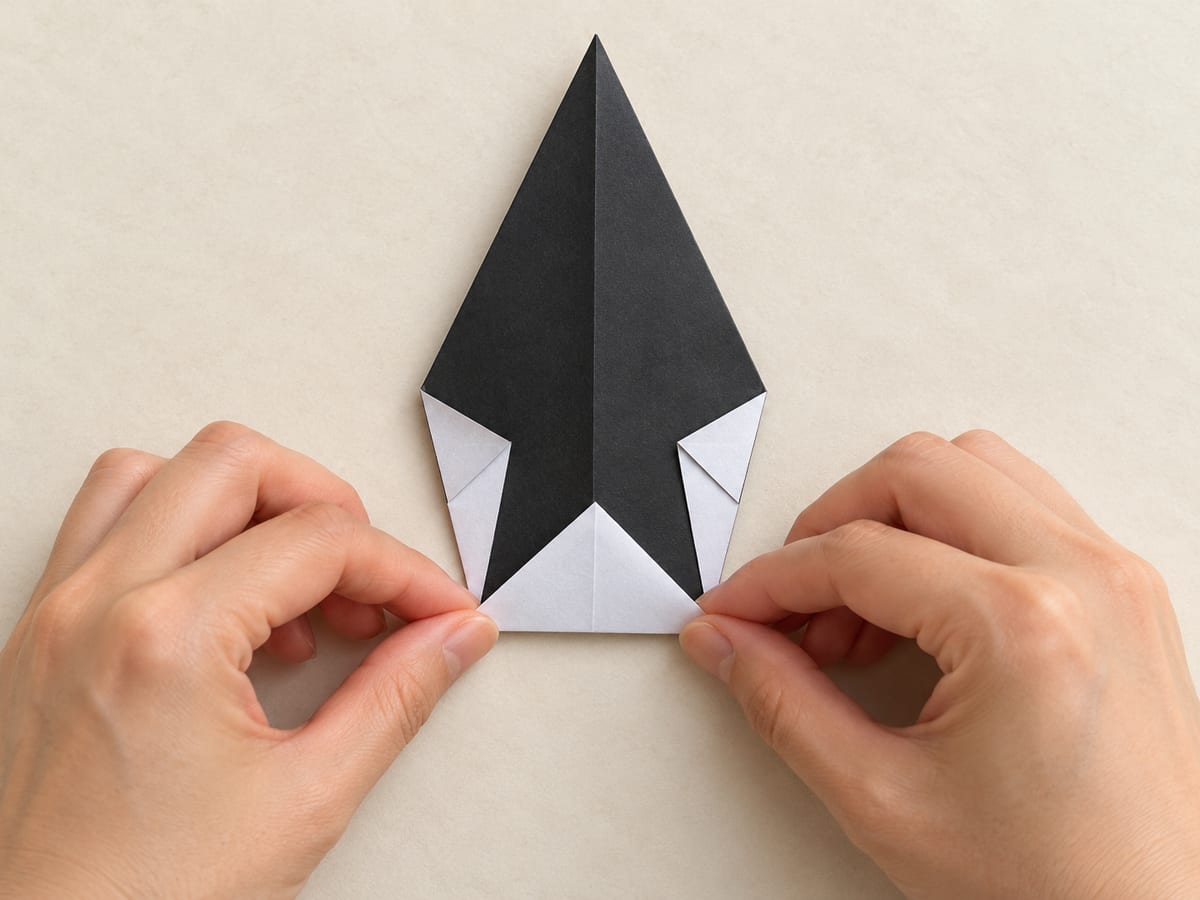
Lift the bottom point to the lower ends of the side flaps and press the new base crease.
Step 6: Close the body
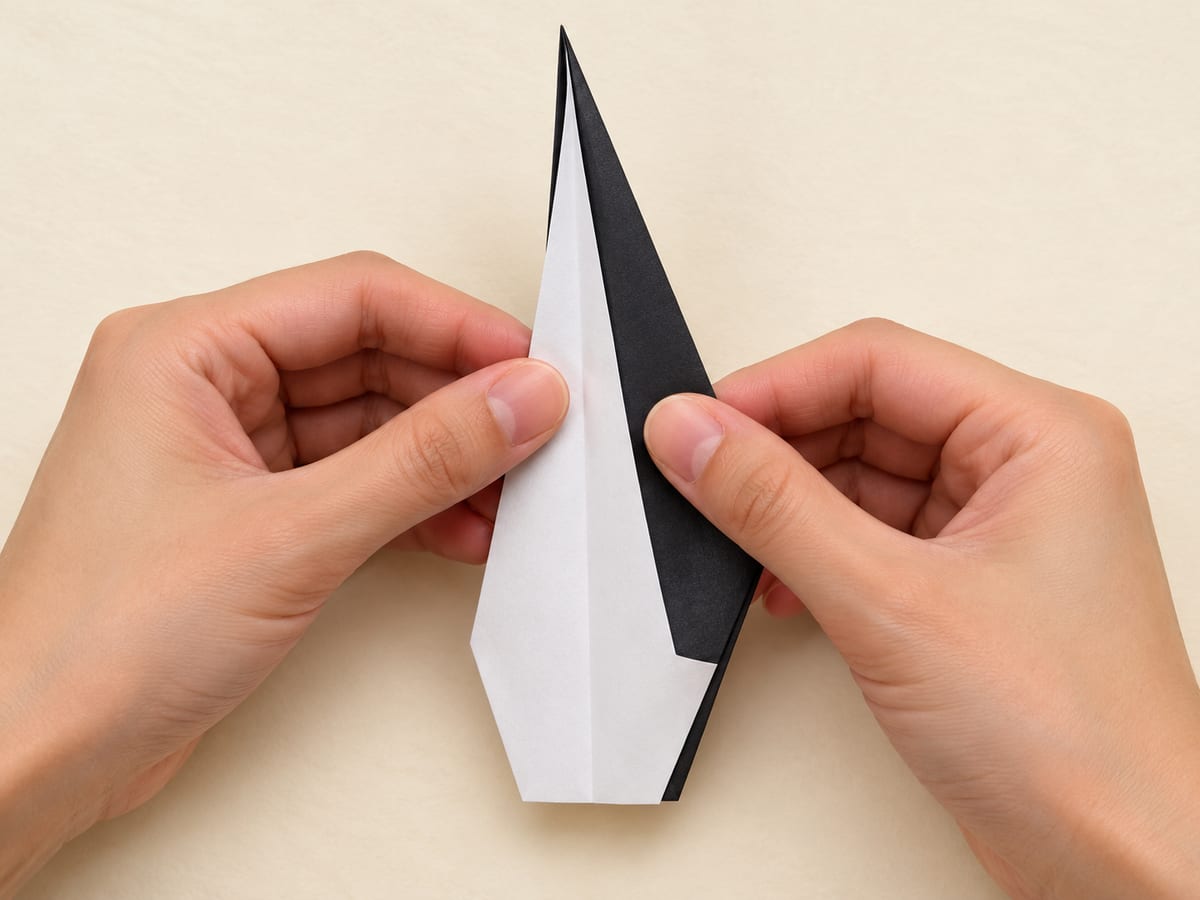
Fold the body in half along its center crease, keeping the broad belly visible outside.
Step 7: Mark the head fold
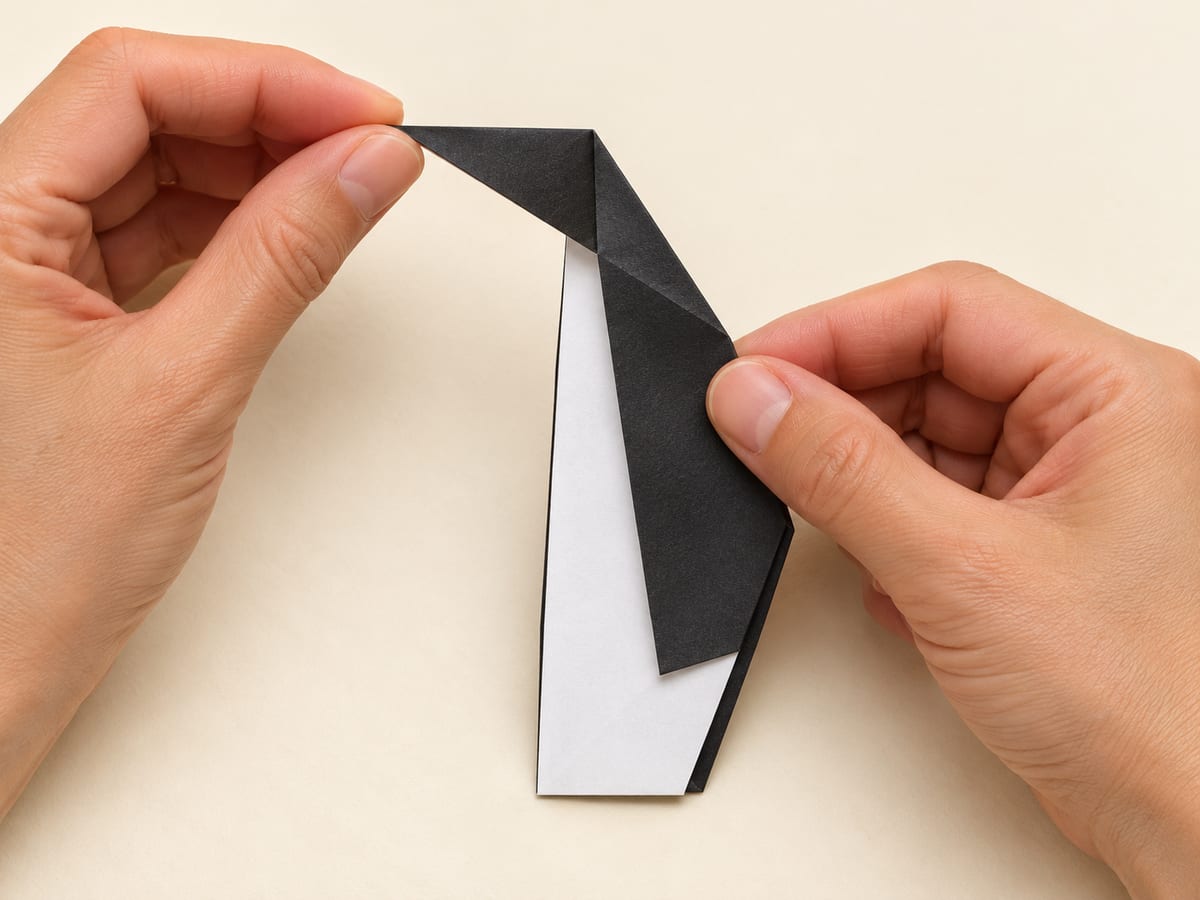
Fold the upper tip sideways to make a short head, crease in both directions, then reopen.
Step 8: Reverse the head
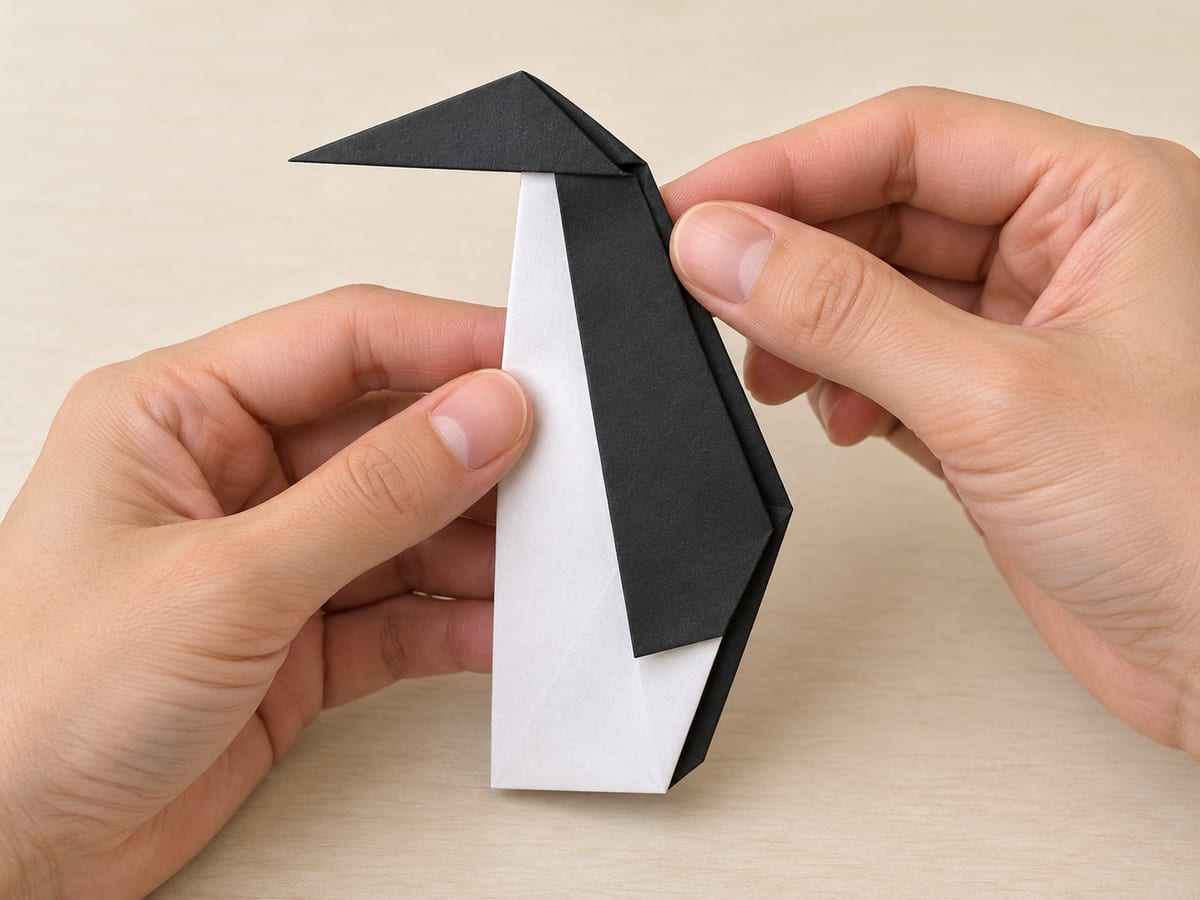
Open the neck layers slightly, reverse the head outward along its crease, and close the body around it.


Try something else
More beginner folds for your next sheet.

Coming soon
Not published yet— steps · — min · —
Coming soon
Not published yet— steps · — min · —