How to Make an Origami Bookmark
Published

Make an origami bookmark that slips over a page corner without glue. A square sticky note is enough for a small pocket, while a larger square of printer or notebook paper gives you more room to fold. Keep the sticky edge facing inward if you use a note. The two side corners tuck into the front pocket to hold the shape.
One fold at a time
Take your time. A neat crease makes the next fold easier.
Step 1: Fold the triangle
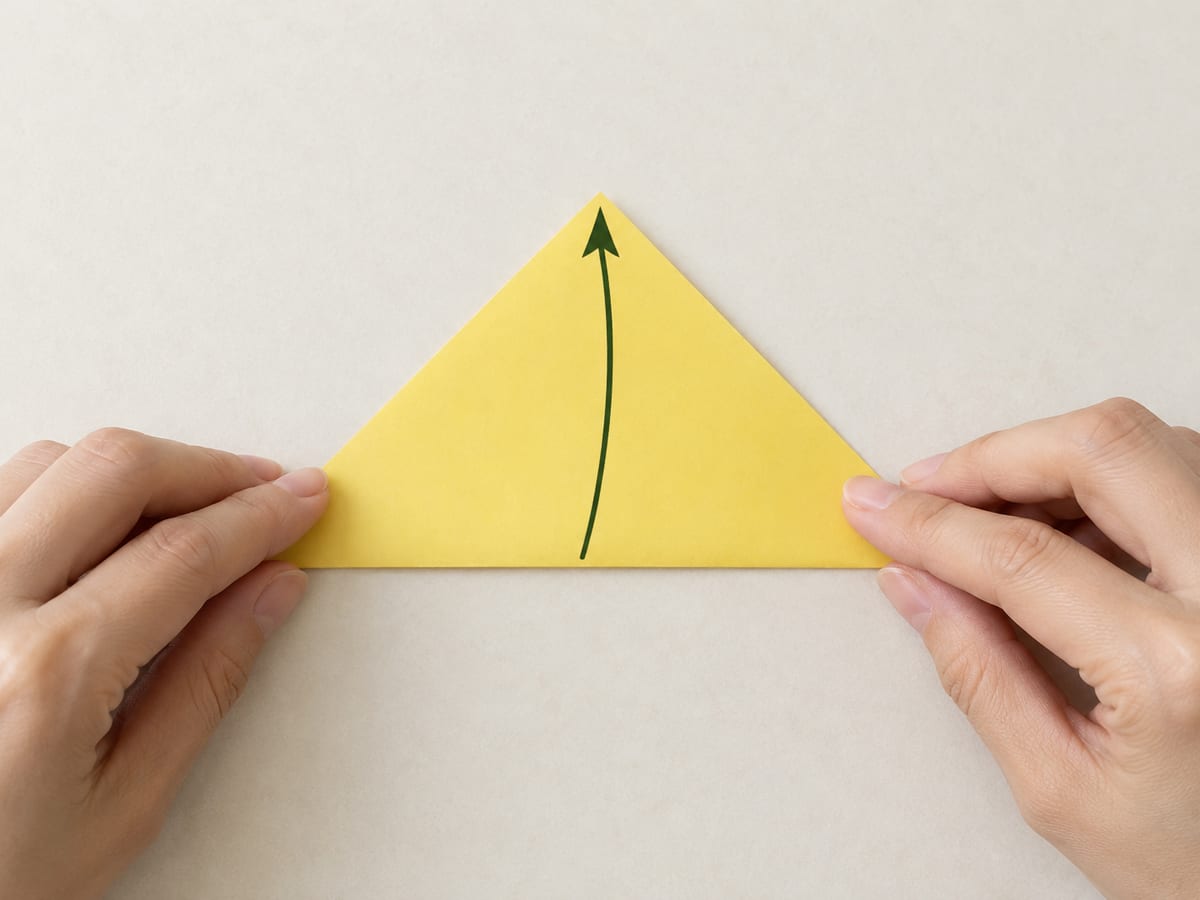
Place the square as a diamond; bring the bottom corner to the top corner and crease.
Step 2: Open the pocket front
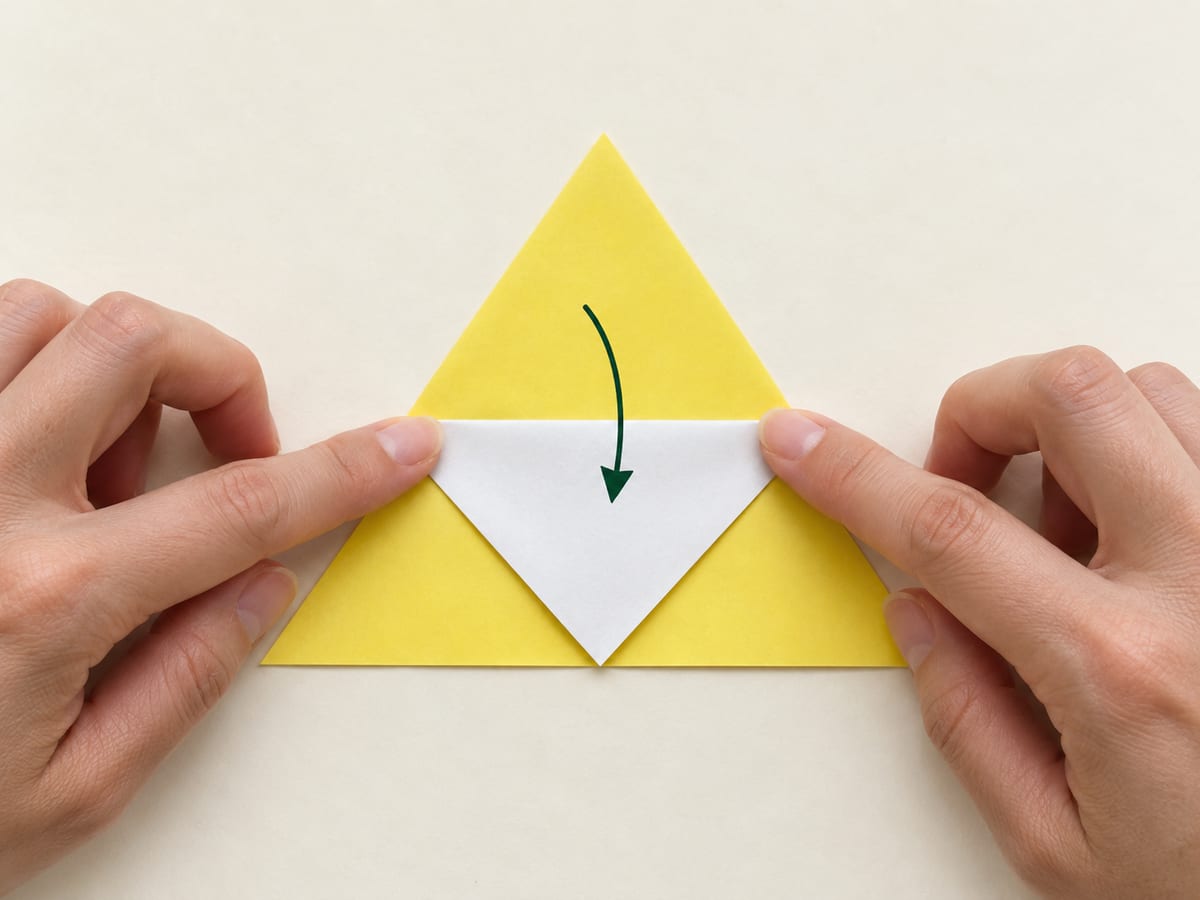
Fold only the top front corner down to the midpoint of the bottom edge.
Step 3: Mark the right side
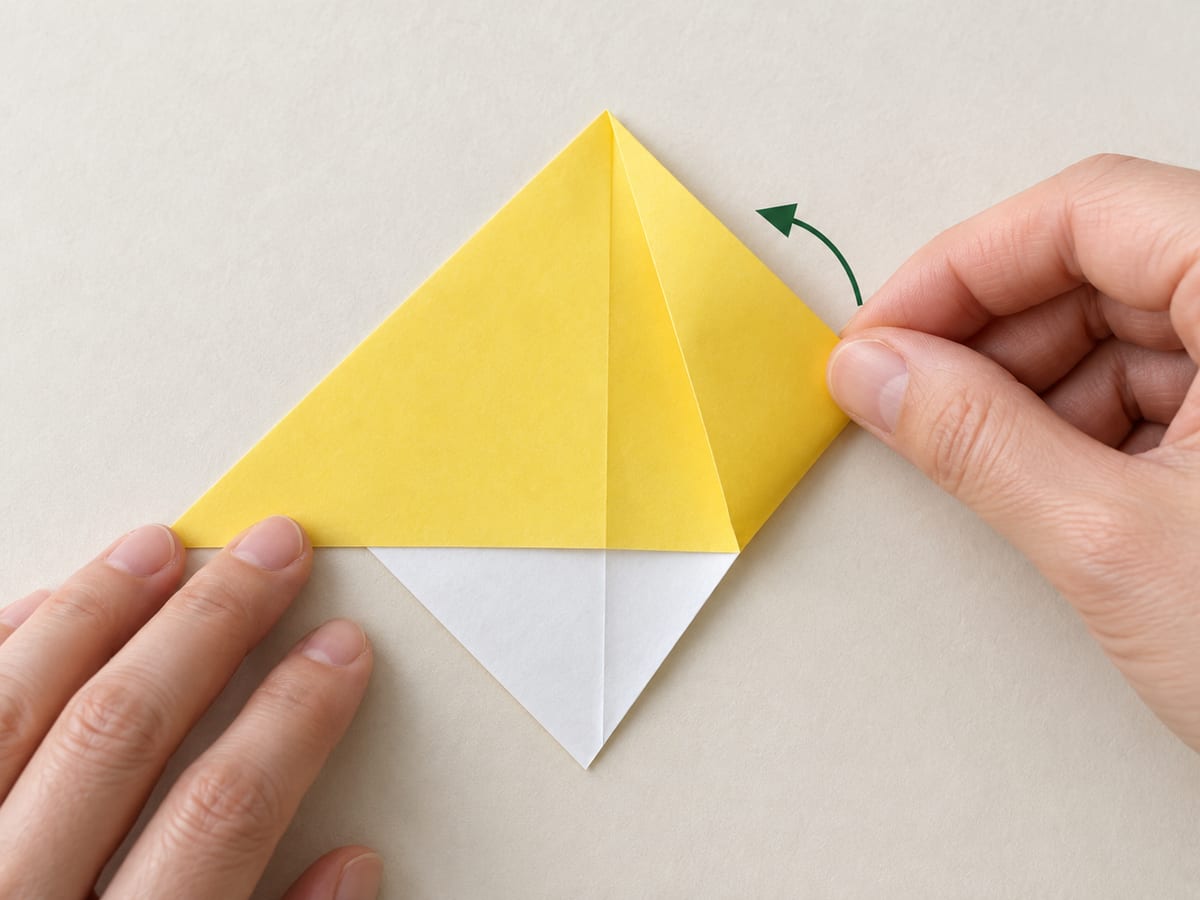
Fold the right corner up to the top point, crease, then return it to the right.
Step 4: Mark the left side
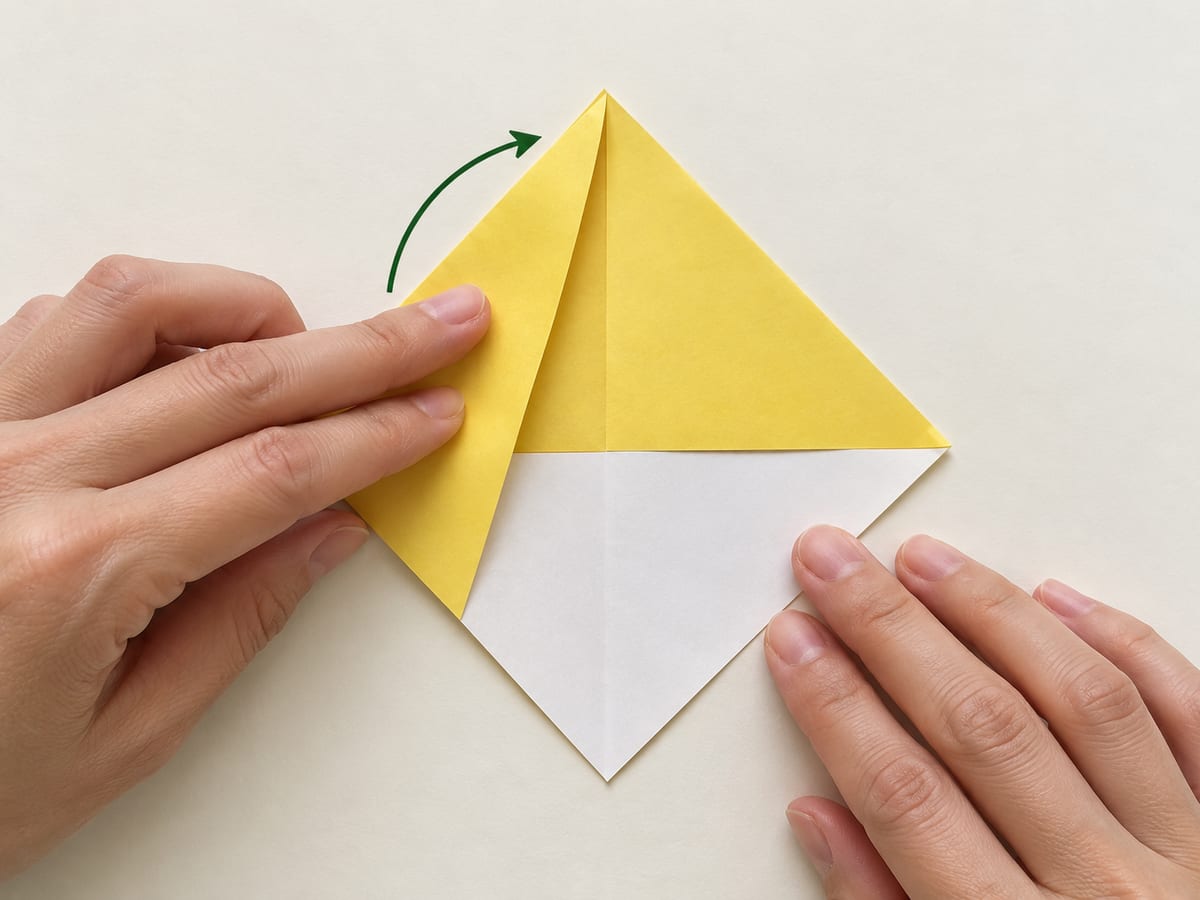
Fold the left corner up to the top point, crease, then return it to the left.
Step 5: Tuck the right corner
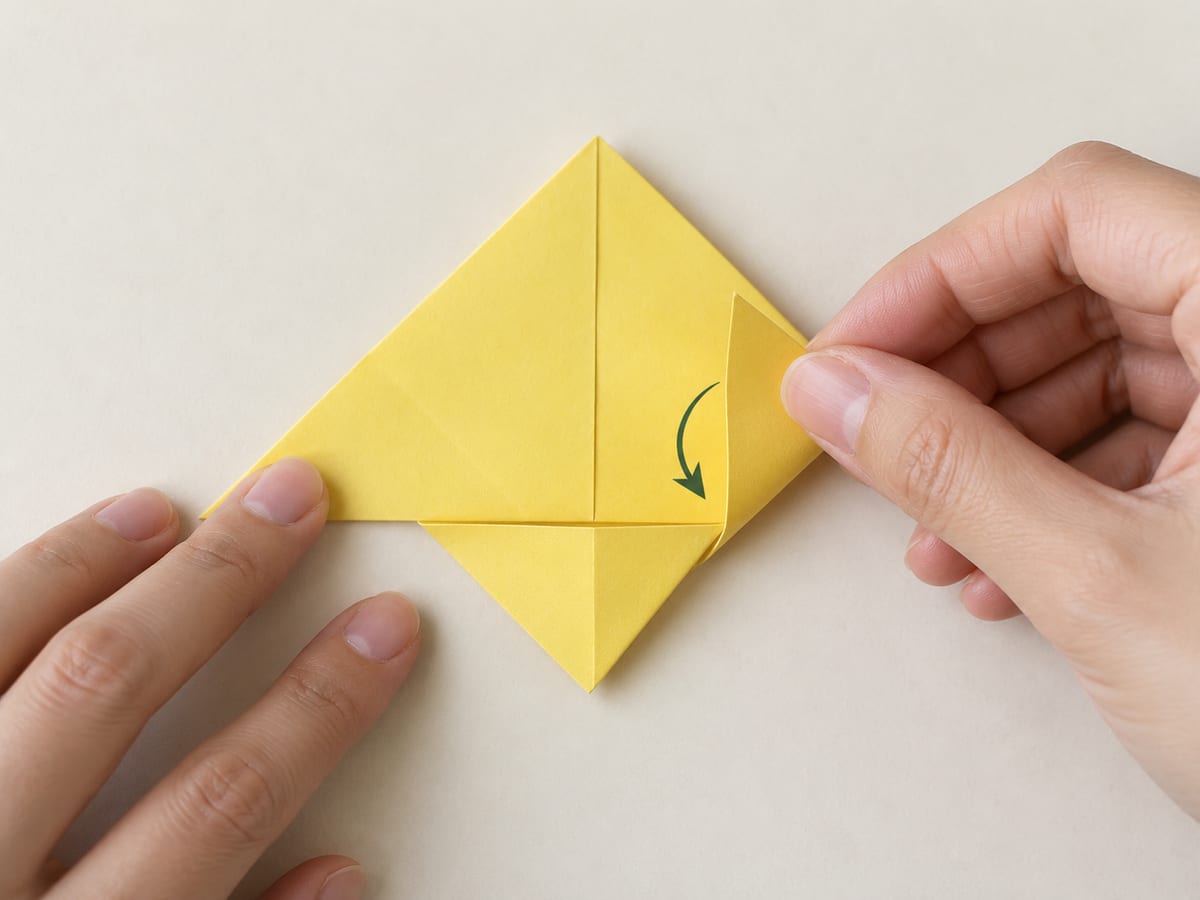
Lift the right corner along its crease and tuck its tip behind the folded front flap.
Step 6: Tuck the left corner
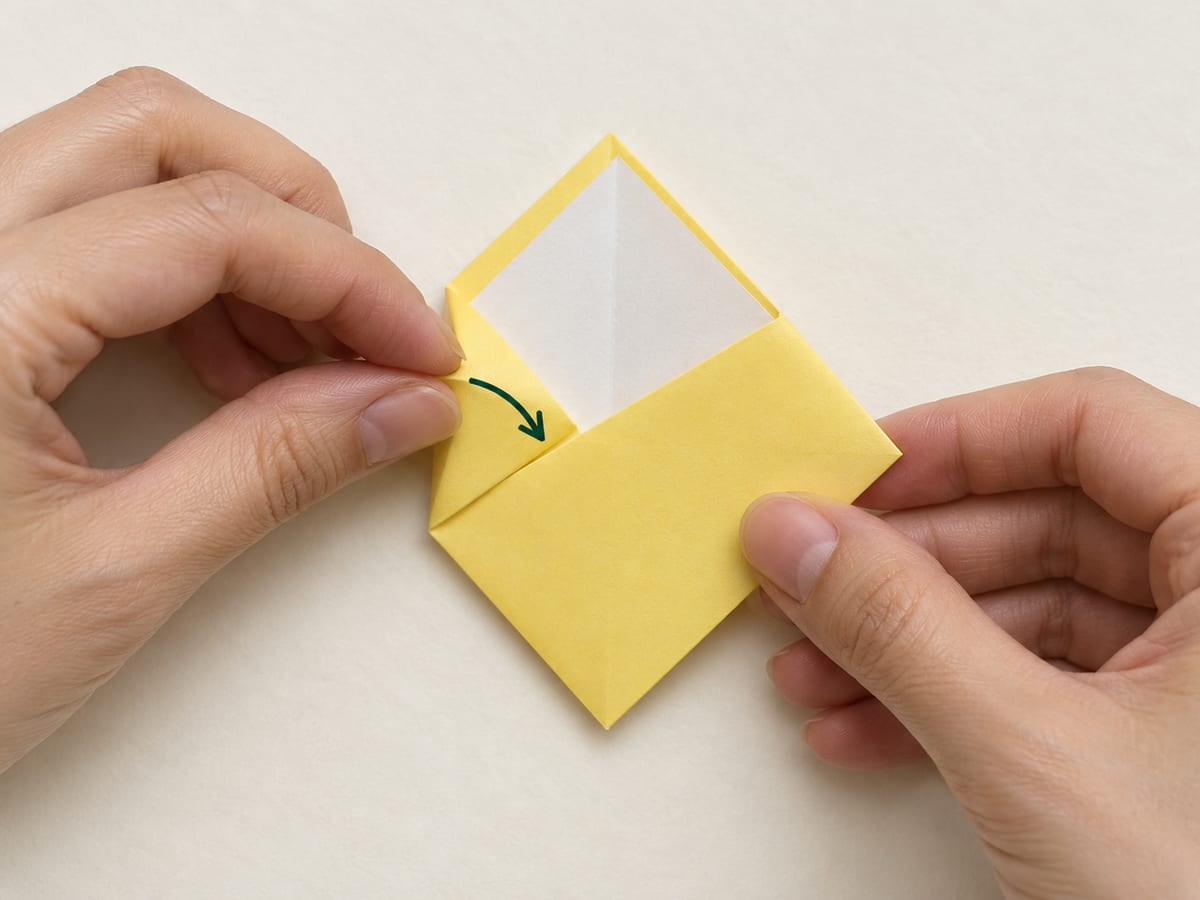
Lift and tuck the left corner into the same pocket, keeping the outer edges aligned.
Step 7: Try the pocket

Flatten the pocket and slip it over a page corner, keeping the paper clear of the text.


Try something else
More beginner folds for your next sheet.

Coming soon
Not published yet— steps · — min · —
Coming soon
Not published yet— steps · — min · —