How to Make an Origami Star
Published

Fold an origami star with six points from one rectangle, keeping every part of the paper connected. An uncut dollar bill works for this version, as does a rectangle prepared from printer or notebook paper. First wrap a triangle, then use guide creases to arrange its corners. This project rewards patient folding; flatten each layer gently before adding the next.
One fold at a time
Take your time. A neat crease makes the next fold easier.
Step 1: Mark the center line
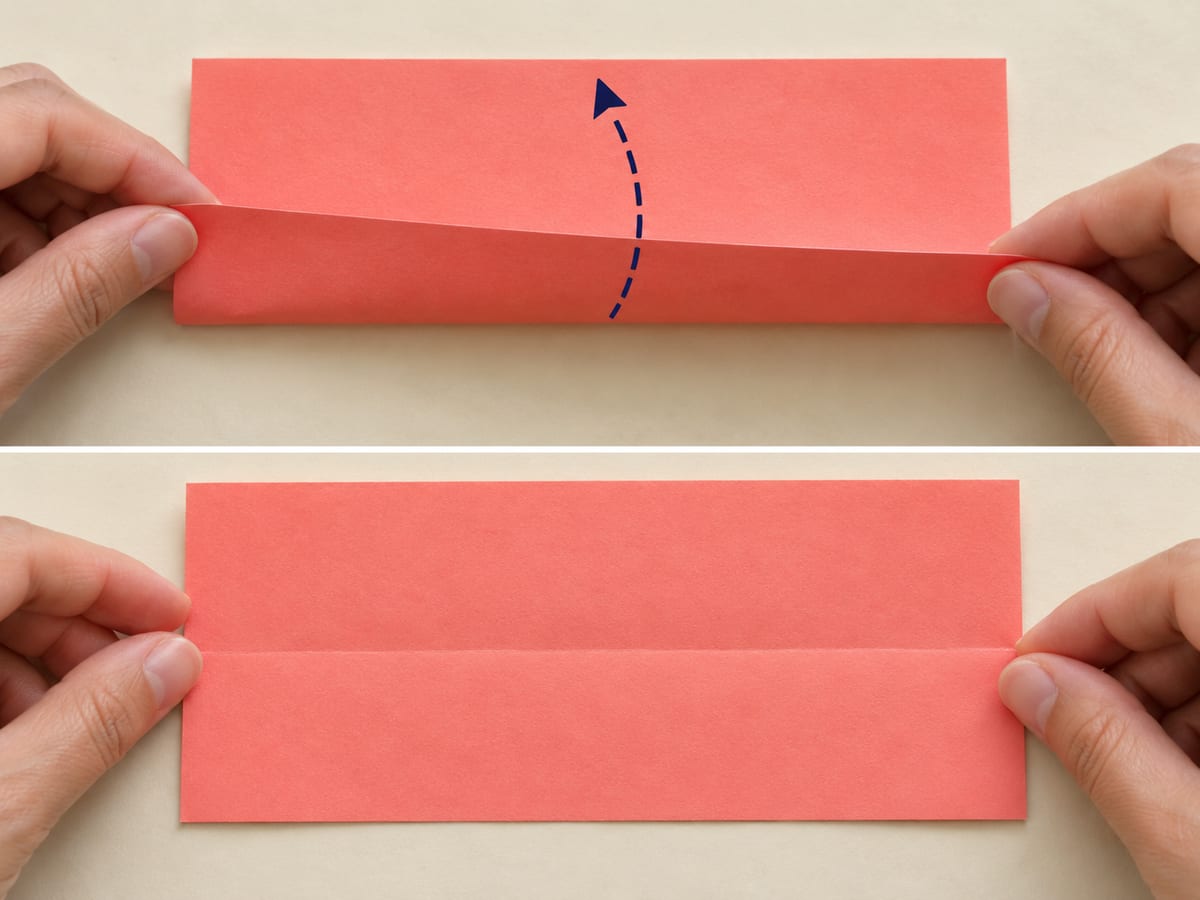
Place the rectangle horizontally; fold the long edges together, crease, and reopen.
Step 2: Start the triangle

Bring the lower-left corner to the center crease, keeping the crease anchored at the upper-left corner.
Step 3: Wrap the first face

Fold the upper-left sloping edge down to meet the bottom long edge, forming an equal-sided triangle.
Step 4: Wrap the remaining paper

Roll the triangle rightward along its edge, wrapping the remaining length around the triangular face.
Step 5: Lock the triangle

Tuck the short leftover end between the triangle layers, then turn one corner upward.
Step 6: Mark three center guides

Fold the triangle in half corner to corner, then reopen; repeat using each corner to mark three center guides.
Step 7: Mark the outer pleats

Bring each corner to its opposite edge, pressing the three straight crease lines firmly before reopening.
Step 8: Turn to the reverse
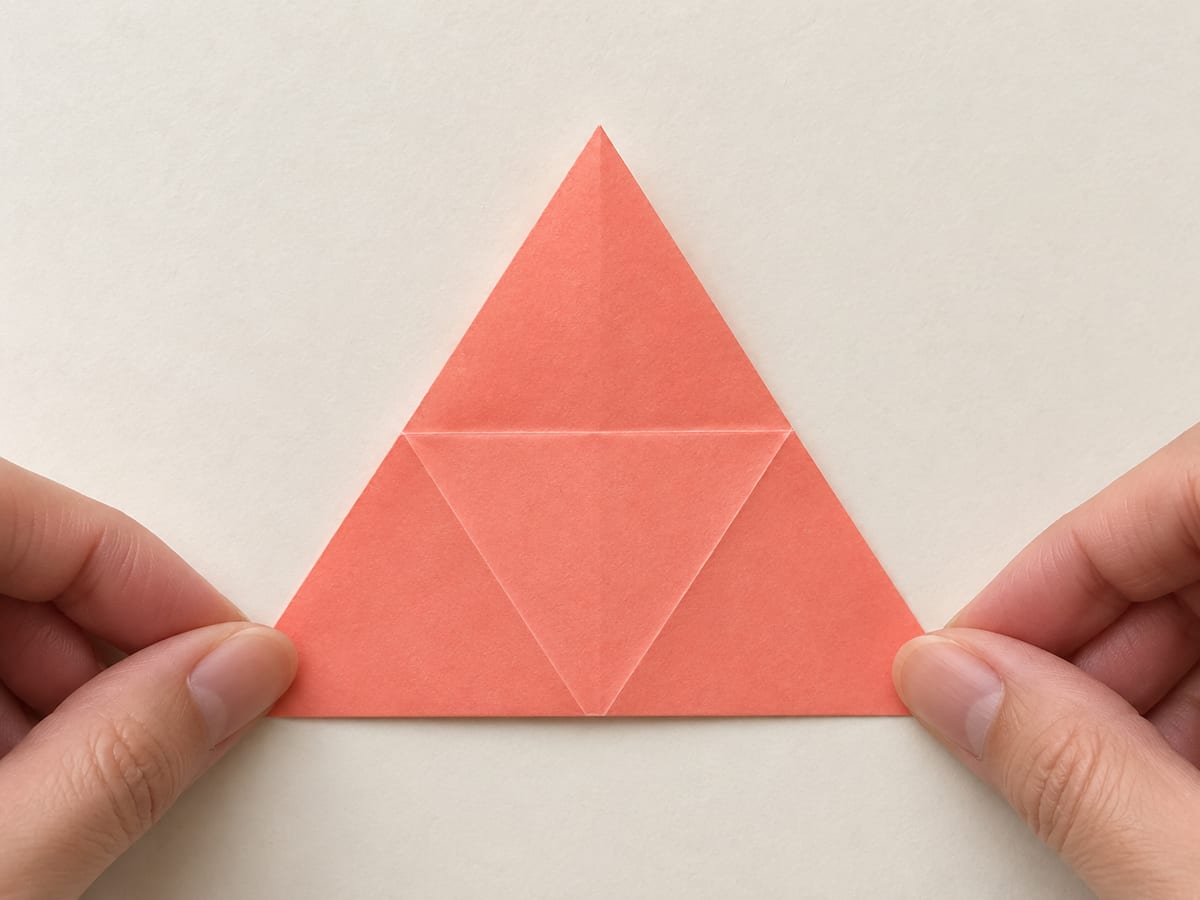
Turn the triangle over, keeping one corner at the top.
Step 9: Mark the inner pleats

Fold each corner to the center where the guide lines meet; crease and reopen all three.
Step 10: Return to the front

Turn the triangle over again, exposing the outer and inner crease pairs.
Step 11: Raise the six points

Pleat each corner along its two guide lines, folding outward at the outer line and inward at the inner line.
Step 12: Lock the last pleat

Slide the last corner beneath the first pleat and press the center flat to finish the six-point star.


