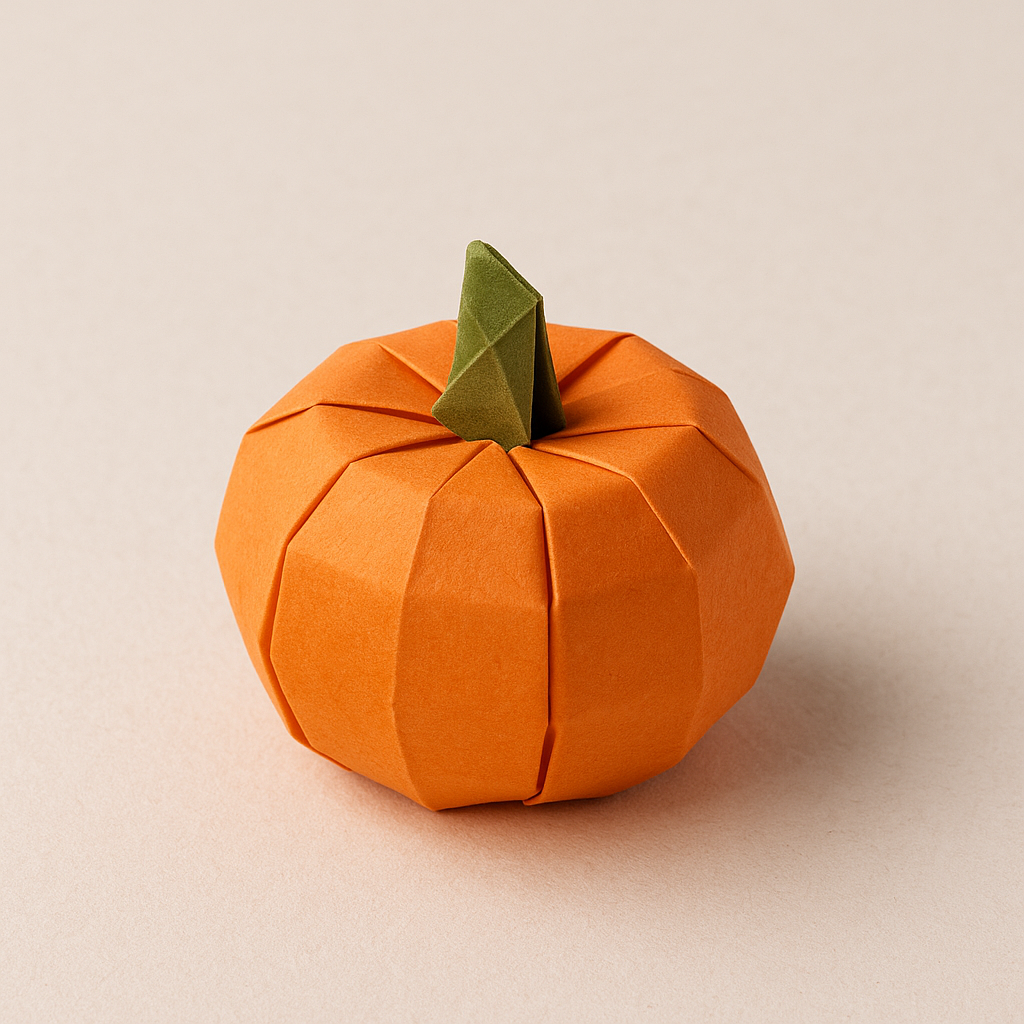
Origami Pumpkin
Fold a charming 3D paper pumpkin, perfect for autumn decorations or Halloween fun!
Get into the spirit of fall with this delightful **origami pumpkin**! This model is a fantastic introduction to 3D origami because it uses a classic “waterbomb base” to create a round, puffy shape that can be inflated. It’s a fun, intermediate-level project perfect for decorating your home for Halloween, Thanksgiving, or just celebrating the autumn season.
Unlike flat origami, this model has volume, making it a wonderful small decoration. It uses a combination of the waterbomb base and several “squash folds” to create the segments of the pumpkin. This guide will walk you through the five key stages, from a flat square to a fully formed 3D **origami pumpkin**.
What You’ll Need for Your Origami Pumpkin
Materials List
- A square piece of paper: Orange is classic! 6×6 inches (15×15 cm) is a good standard size.
- A small strip of green or brown paper (Optional): This will be for the stem.
- A flat, hard surface: Essential for making your creases sharp and precise.
Folding Your 3D Origami Pumpkin in 5 Key Stages
Stage 1: Form the Waterbomb Base
The foundation of our pumpkin is the “Waterbomb Base.” Start with your orange paper colored side up. Fold it in half diagonally (corner to corner), crease sharply, and unfold. Repeat with the other diagonal, then unfold. You should have an ‘X’ crease. Flip the paper over (white side up). Fold it in half horizontally (edge to edge), crease, and unfold. Repeat vertically. With the white side still up, gently push the left and right sides (the vertical crease) inwards. The paper will naturally collapse along your creases into a flat triangle. This is the Waterbomb Base.

Stage 2: Fold Corners to the Top
Position your Waterbomb Base with the open points (the four flaps) facing upwards. Take the bottom-left corner of the *top layer only* and fold it up to meet the top point. Crease firmly. Repeat this with the bottom-right corner of the top layer, folding it up to the top point as well. Your model will now look like a diamond. Flip the entire model over and repeat these two folds on the other side.

Stage 3: Squash Fold All Four Flaps
This is the most involved step. You should now have a diamond shape with two flaps on the left and two on the right. Take the right-hand flap (top layer only) and fold it over to the left, like turning a page. Now, take the flap underneath it, lift it upwards, open it, and press it flat into a kite shape. This is called a “squash fold.” Fold the “page” flap back to the right. Now, repeat this process: fold the left flap over to the right, squash fold the flap underneath, and fold it back. Flip the entire model over and repeat these two squash folds on the back side. You will end up with eight small triangular flaps.

Stage 4: Round the Shape and Prepare to Inflate
You’re almost there! Fold the small triangular points that stick out at the sides inwards, tucking them neatly behind the main flaps to make the shape more rounded. Then, fold the very top point (all layers) down a small amount to create a flat top. Similarly, fold the very bottom point (where all the layers meet) up a small amount. This starts to round the pumpkin’s form and, crucially, reveals the small inflation hole at the bottom center.

Stage 5: Inflate and Add Stem
Carefully locate the small hole at the bottom. Hold the model gently and blow a sharp puff of air into the hole. The model should puff up into a round, 3D **origami pumpkin** shape! You may need to gently crease the sides to enhance the pumpkin’s segments. (Optional: To add a stem, roll your small strip of green or brown paper into a tight cylinder and gently insert it into the small opening at the top).

Tips for a Plump Origami Pumpkin
Paper Choice
Thinner origami paper (Kami) is generally better for inflatable models as it’s easier to puff up. Stiffer paper might hold the shape better but be harder to inflate. Standard printer paper (cut into a square) also works well for this model.
Inflation Technique
Don’t be gentle! A short, sharp puff of air works much better than a long, slow blow. Make sure the hole at the bottom is clear and not sealed by the folds. If you’re having trouble, you can gently open the model with your fingers first.
Creative Project Ideas
This 3D model is perfect for decorations. Here are a few ideas for your **origami pumpkin**:
- Pumpkin Patch: Make several pumpkins in different sizes (using 8×8″, 6×6″, and 4×4″ paper) and cluster them on a mantle or table for a festive fall display.
- Halloween Garland: String several pumpkins together with a needle and thread for a perfect Halloween garland.
- Thanksgiving Place Cards: Write a guest’s name on a small paper “leaf” and attach it to the stem of a pumpkin to use as a unique place card holder for Thanksgiving dinner. You can even pair it with an Origami Swan Napkin for a full-fledged festive table.
For a different, non-inflatable 3D pumpkin, you can find many modular variations. Origami Resource Center shows a popular 3D-piece model which is a great next step.
This puffy **origami pumpkin** is a fun way to practice using the waterbomb base for 3D shapes. Make several in different sizes and shades of orange to create a festive paper pumpkin patch! Happy Halloween folding!
</s’p>